Model Elco 80 Foot PT Boat
Last Edit/Update 23 May 2024 1325
This is the story, warts and all of the model I am in the process of building.
History of the Elco
The name Elco is derived from the company that built the Patrol Torpedo (PT) Boat, the Electric Launch Company.
You will find a very detailed history of the Elco PT boat on Wikipedia.
The Lead Up
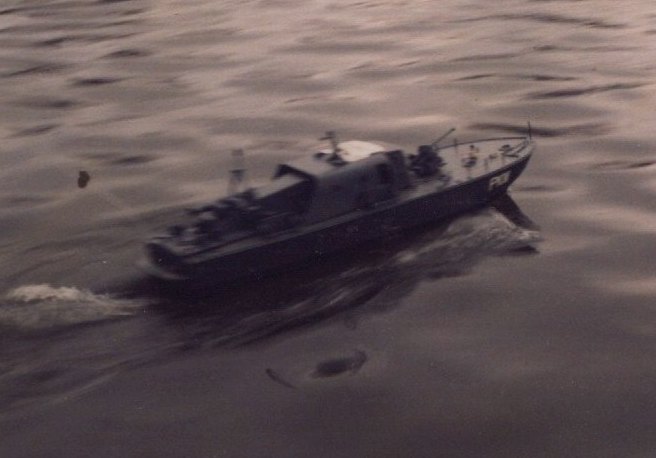
In the late 1970s I built a Perkasa PT boat. Powered by a Nitro Engine it went fast and shook to pieces easily. I had a lot of fun with it until the boating lake at East Park filled up with shopping trolleys. I think it has been sorted out now though. This is the only photo of it, thanks to Cooky. No torpedoes, they were launched earlier in the mission. Later to be mounted more securely.
I recently moved house and just a stone's throw away is a very large lake, the owner of which is into many things which includes model boats. He is wanting to start up a model boat club and will allow me to use the boat I build on his lake.
So, what to build? A fast patrol torpedo boat was the first thing that came to mind and I have stuck with it.
I telephoned the local model shop Just Kits in Hull who did not have the model kit that met my requirements of a 1 meter long electric powered PT boat. They said that Deans Marine, was a good place to look.
The Purchase
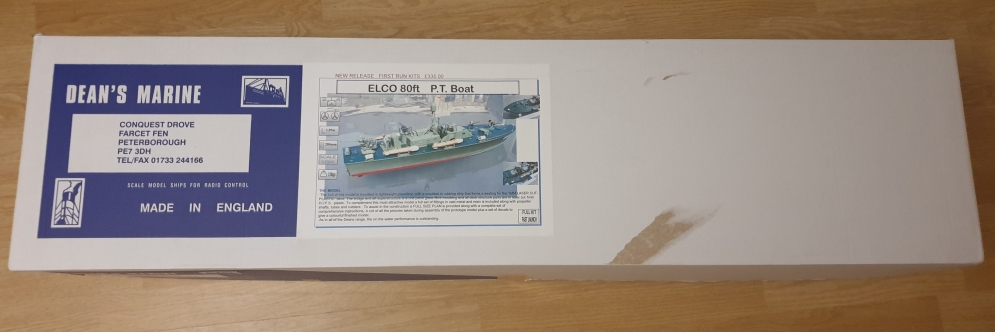
I went on the Deans Marine website to discover the very thing wanted, the Elco 80ft. An email conversation with them ended up with a list of stuff needed to complete the essential parts of the build. Started saving pocket money. It took a few months. To avoid extra charges and postage costs I decided to go down to Peterborough and pick the kit up in person from the shop/factory.
8th 9th September 2023
I had thought to camp in the area for the night, it just so happened that the Deans Marine open days were at the time I wanted to go. A very happy coincidence as they have a paddock that can be used for camping. We had a great time, a big thank you here to Ron the owner who took me under his wing and gave me a lot of advice. He made my wife and I feel very welcome amongst his family and friends that were there.
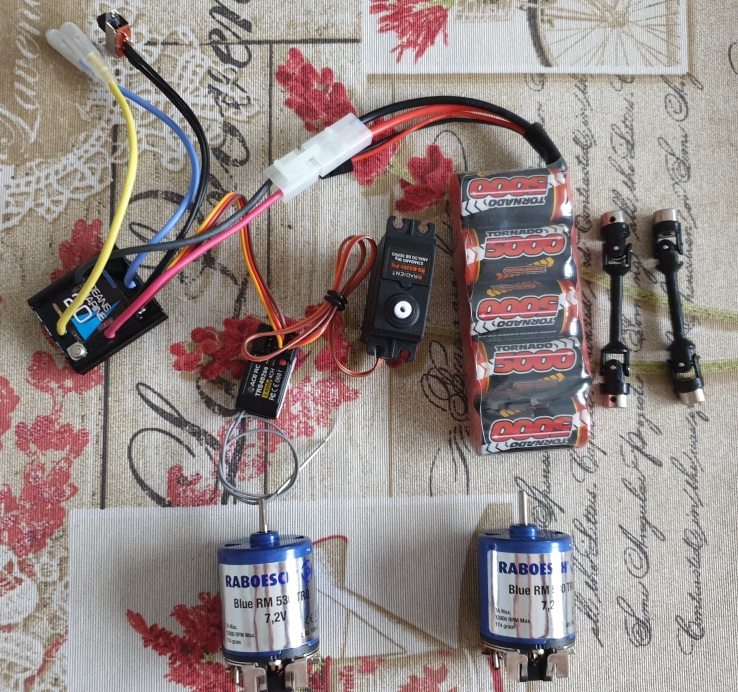
So, loaded up with the kit, motors, linkages, ESC, battery pack and rudder servo, I headed home happy as a pig in poo.
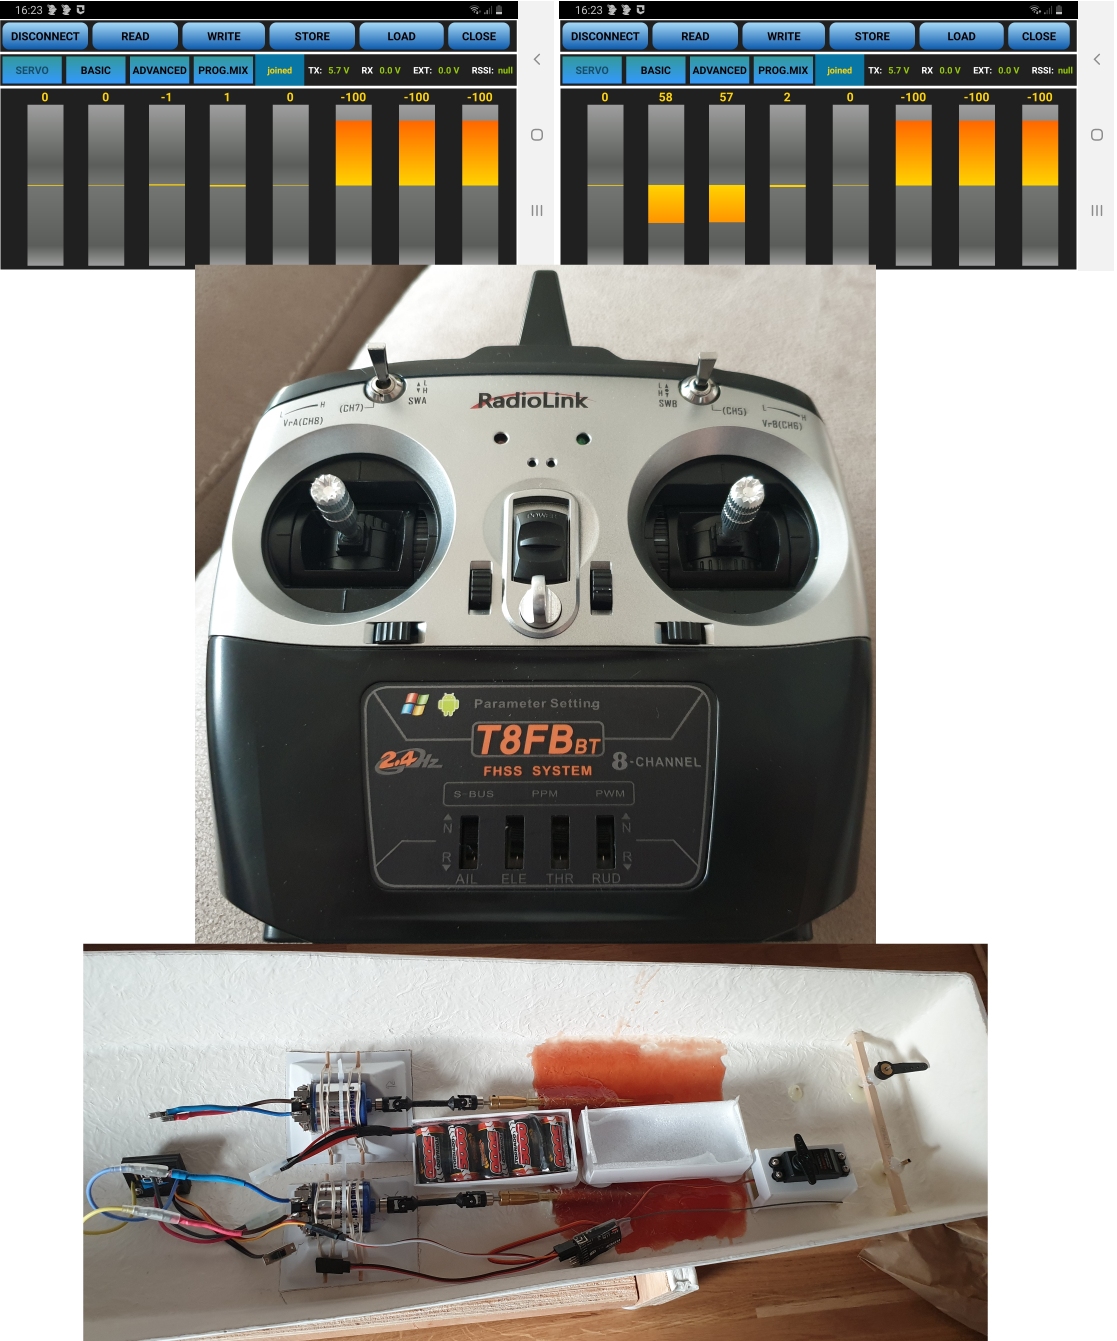
The image below shows a radio receiver bought off Ebay. This was the cheapest way to get started, using the current transmitter. The intention is to wire both motors from one ESC initially but eventually there will be an ESC and battery pack for each motor. Three factors were involved in this decision. The first being cost, the budget wouldn't stretch to the extra kit needed. The second being Ron's advice which was to get help on using twin motors separately before trying it. The third being that a new transmitter is needed as the current one is a wheel and trigger. The boat will be built with the later conversion in mind.
Checking and Initial Wobbles
The next day, a trip to the local hardware shop to stock up with glues, tools and all the other disposable paraphernalia involved with making a model.
Charged up the battery pack on the Imax B6 using the conditioning program. Connected everything together and tried it out. Relief as it all functioned as hoped.
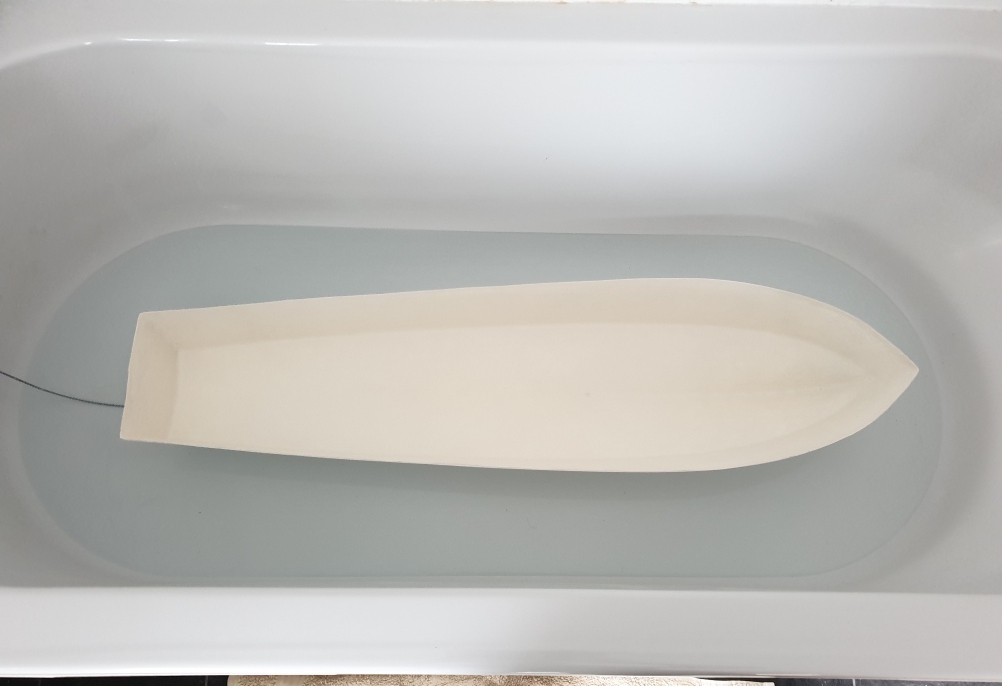
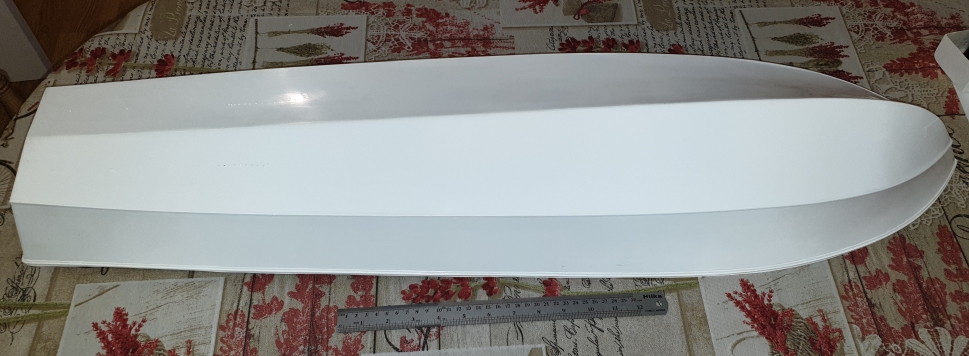
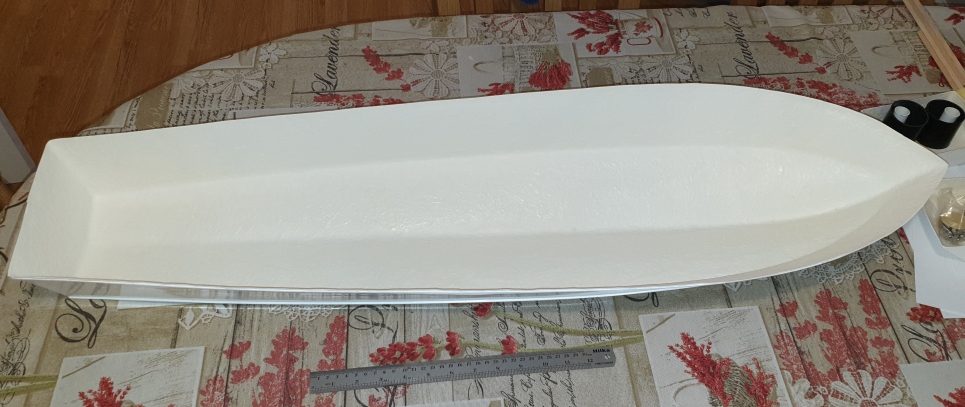
The instructions and Ron, both emphasised the importance of cleaning off the wax residue from the glass fiber parts of the kit with great care. Wiping a finger on the hull for only a couple of inches would cover the finger end in a white powder. Sugar Soap, hot water and the bath all came in useful for this. I washed all of the parts not wrapped. Floating for the first time:
Kit Contents
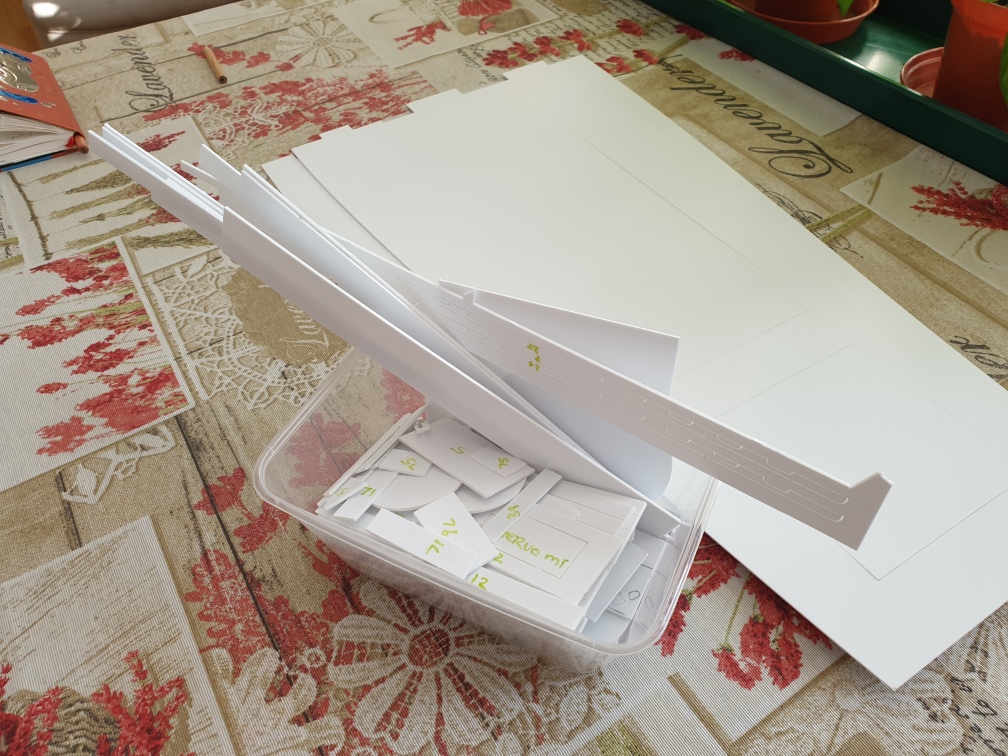
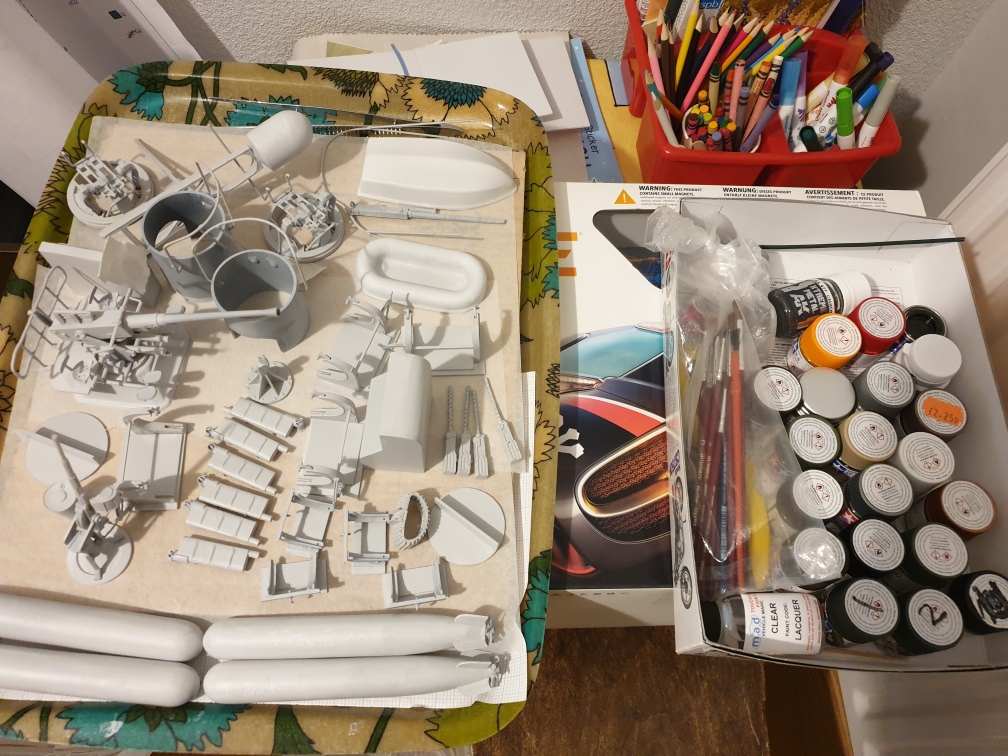
Next came the meticulous counting of parts and comparing with the parts list. The instructions come with a check list and photographs of the sealed trays, making it very easy to see if everything is present. The images below show most of the items included in the box.
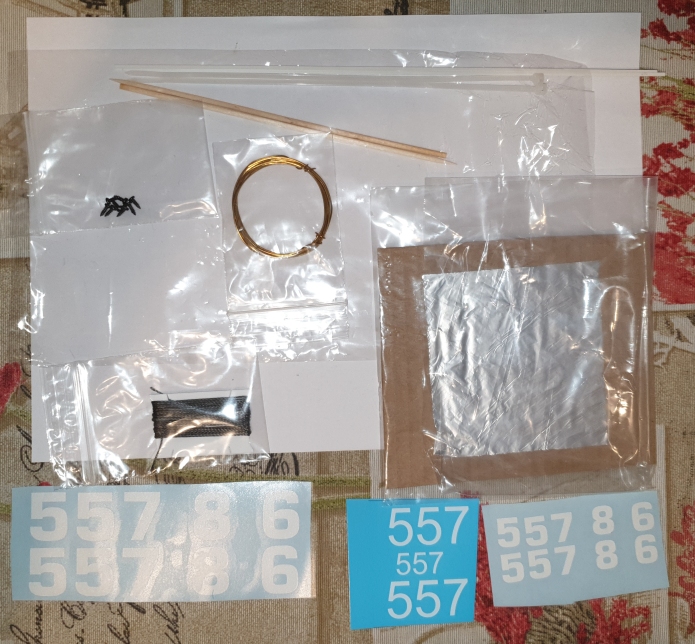
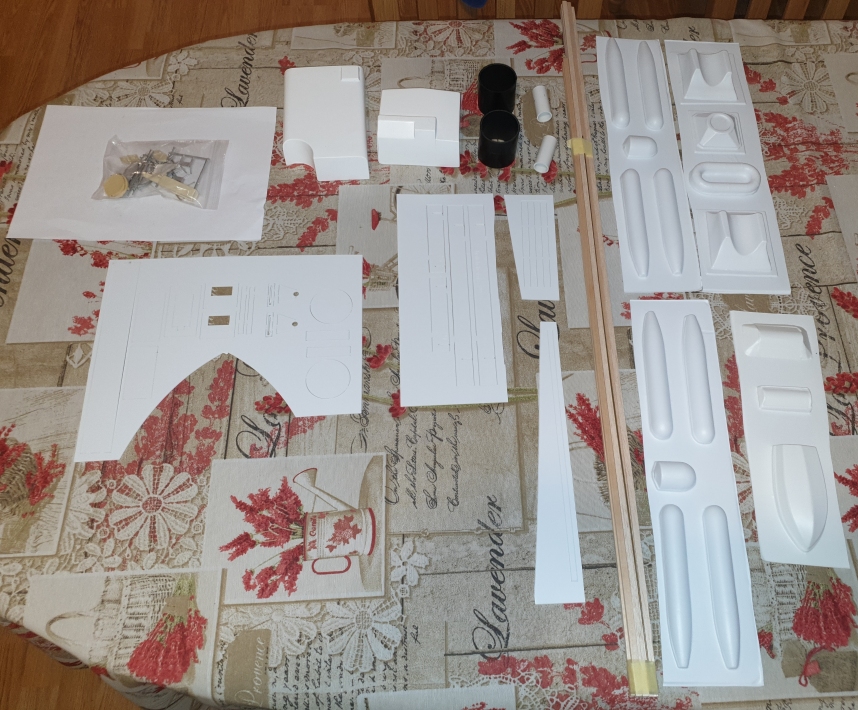
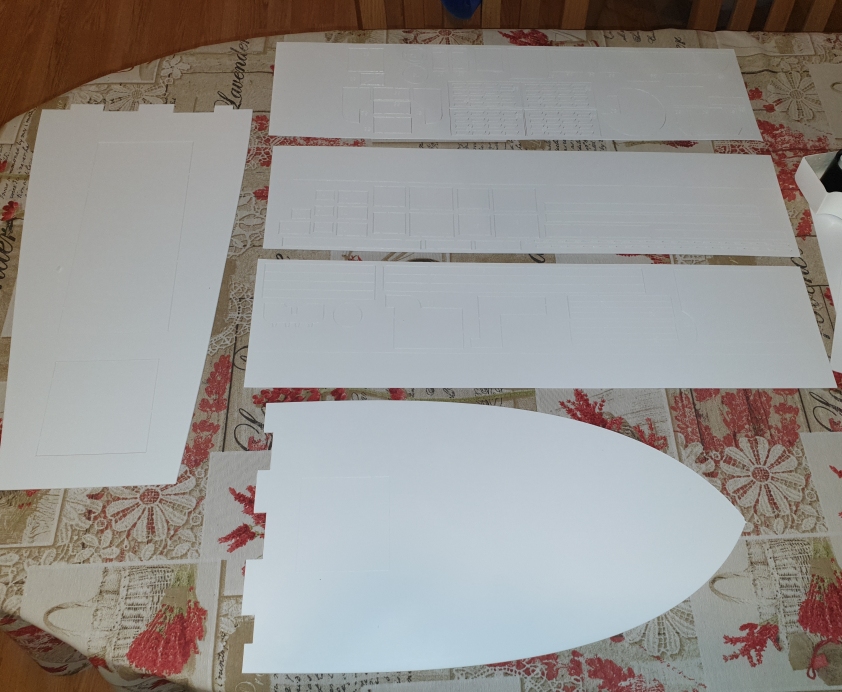
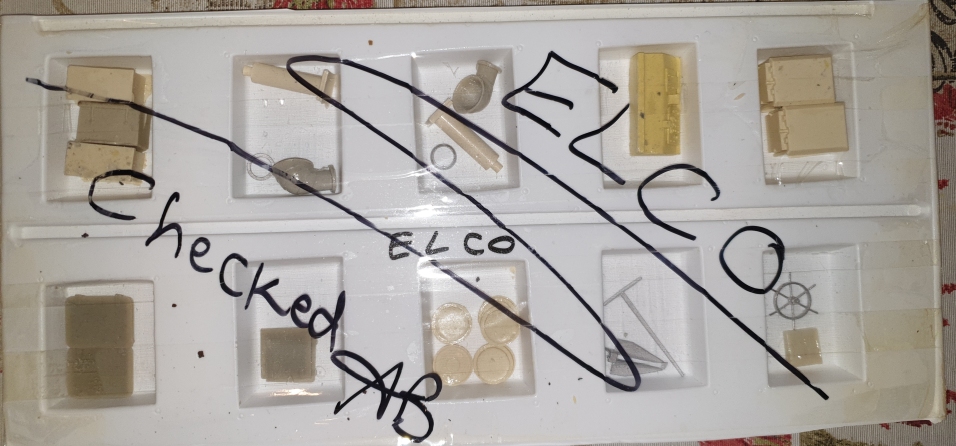
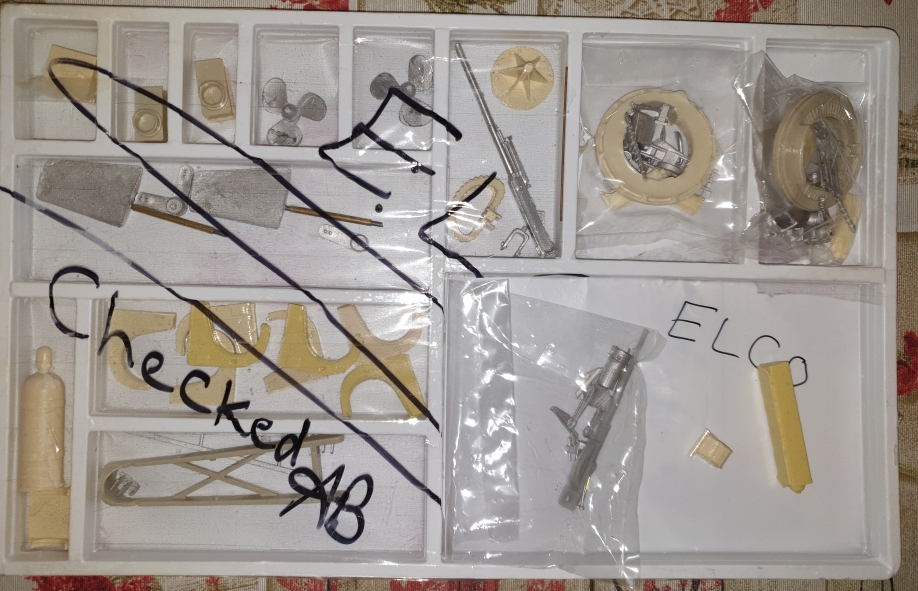
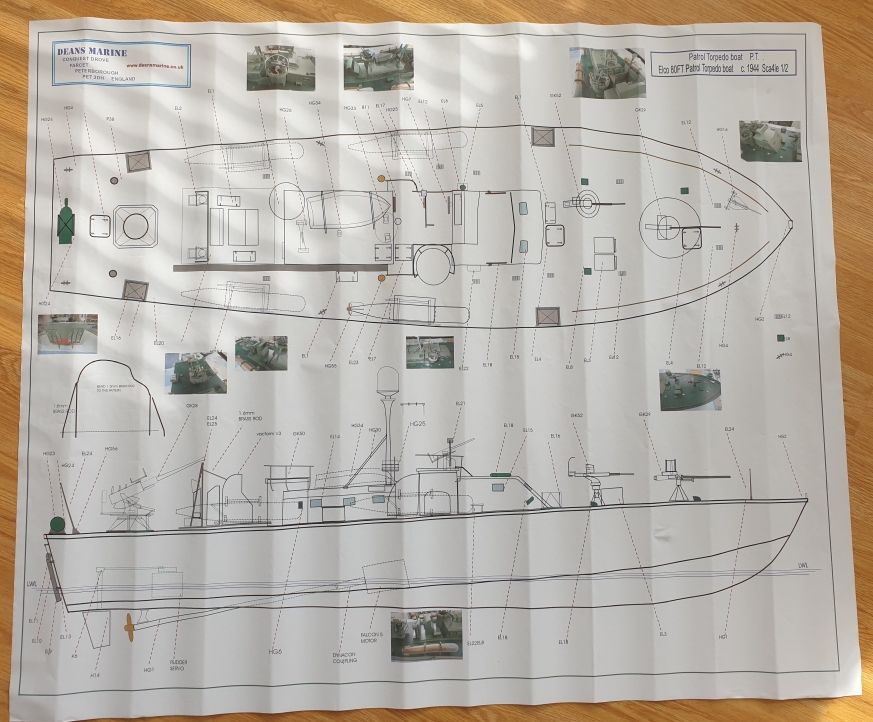
Also included was a checklist with a code for the kit (that looks like the date of manufacture followed by the kit number). A CD containing 465 images of an Elco build process, very useful indeed. The parts list on 3 pages, listed items with photographs of two of the trays. An addendum page with information about the kit having been upgraded to laser cut sheets and how to use them. Finally a 27 page booklet of instructions with photographs.
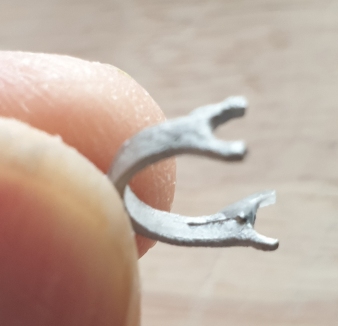
There was only 1 part missing from the kit, both forward sights for the Bofors gun. I emailed Deans Marine and was promised the parts would be posted to me (arrived promptly 14/09/2023).
Checking The Parts
I was very concerned about a couple of the resin parts of the kit. The first part I took out of a sealed section of one of the three trays was tacky to the point it stuck to my fingers. I emailed Deans Marine about this and they said it was a combination of it being sealed in plastic and recent extreme heat in their store. They had problems with that, apparently many of the glues in their shop had evaporated in their containers. They said the problem would resolve itself. I type this a day after opening all of the trays with resin parts and they are, as promised, no longer tacky.
13/09/2023 I made a list of all the part numbers and which sheets they were located on and then sorted the list by part number. Then compared the parts with the instructions while reading through the instructions very carefully.
I made a list of the materials and tools that are still required at the same time.
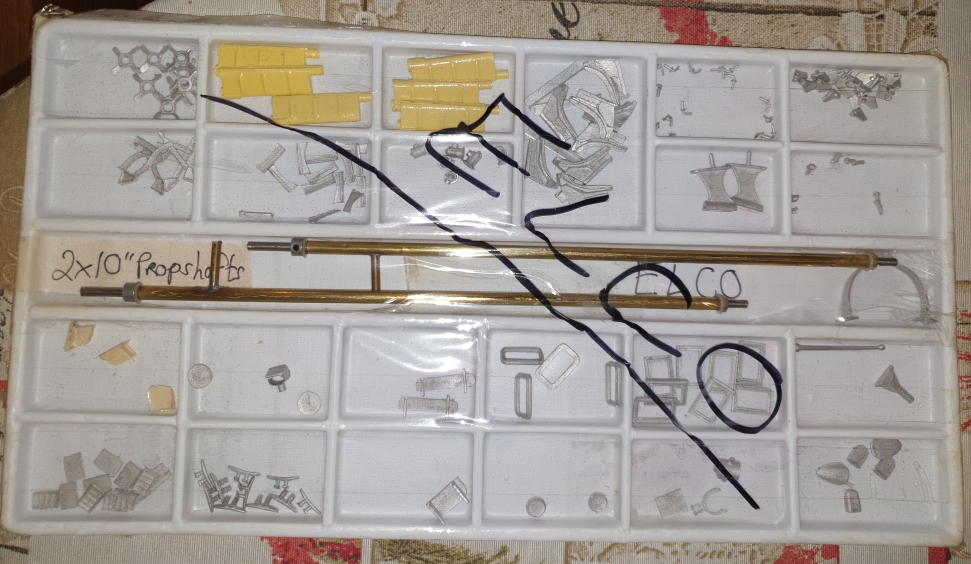
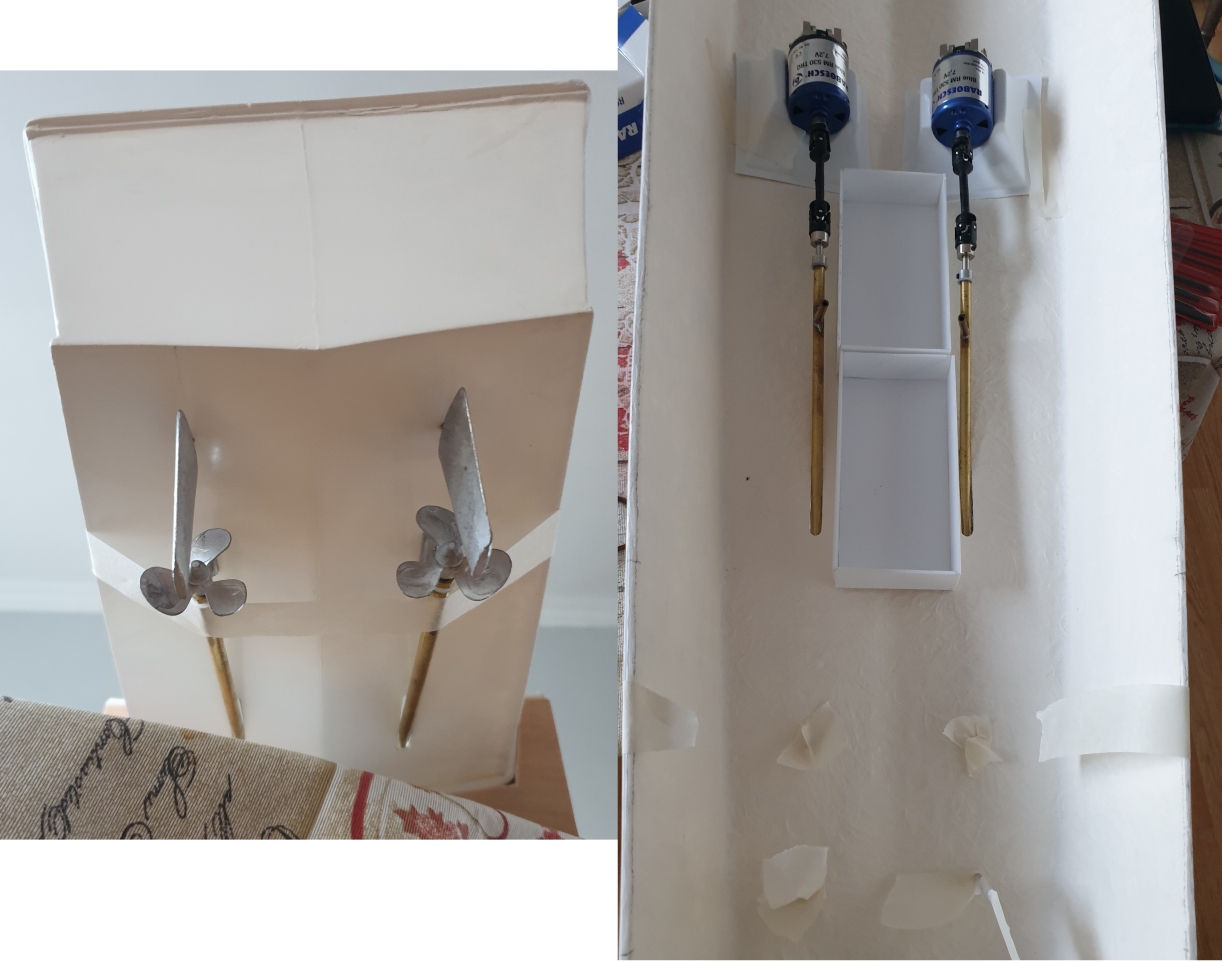
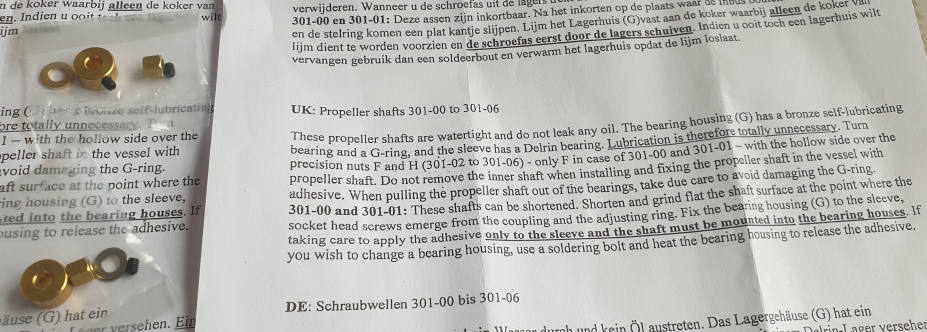
I will get the upgraded version of the propeller shafts, so construction cannot proceed very far until those are saved up for and purchased as they are just about the first things to go into the build. The shafts recommended in my set of instructions are no longer available, an email to Deans Marine elicited a rapid response with an updated page for the instructions with the currently recommended propeller shafts (more on instruction updates 15/09/2023). The upgraded shafts have the same dimensions on paper, so a start can be made on the preparations to the hull.
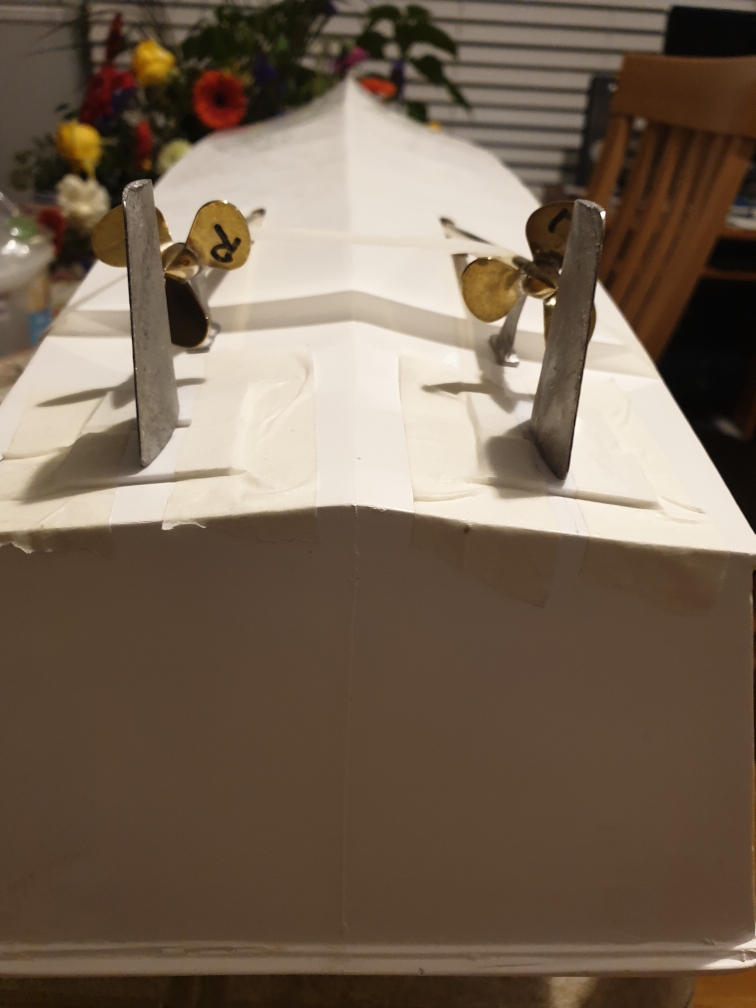
The propellers will be upgraded to brass. The cast ones in the kit are only for setting up purposes and there is a very small hole in one of the supplied blades, I thought about filling it with solder and tried soldering on a piece of flash then testing to destruction. It did solder OK but turned to a ball a little too readily for my comfort, so epoxy it will be.
Construction
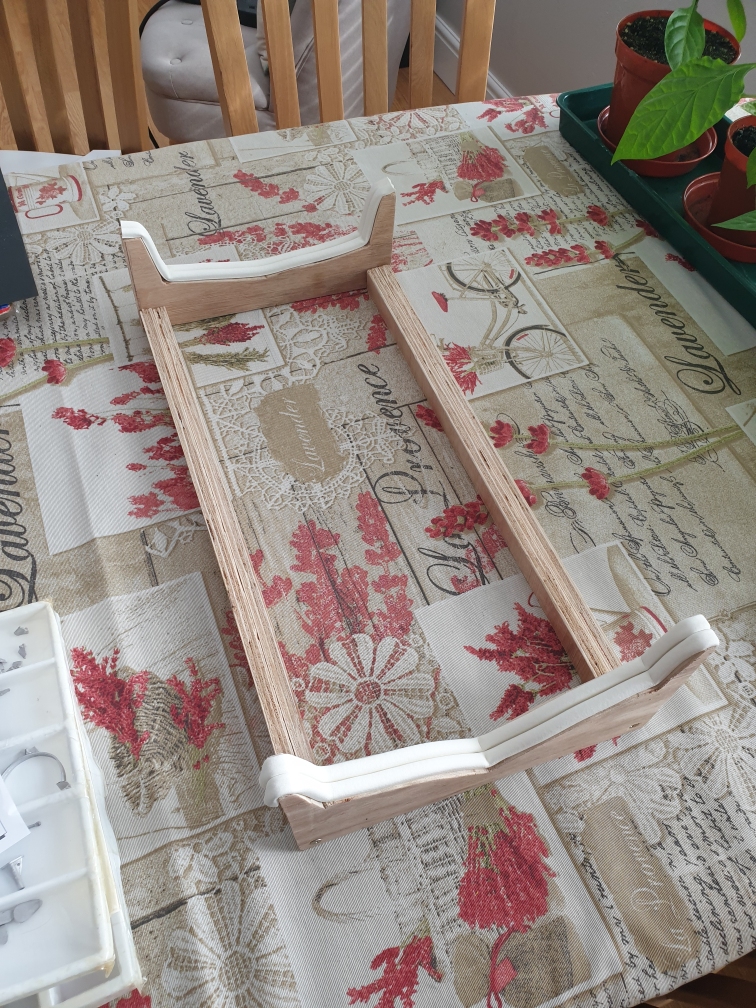
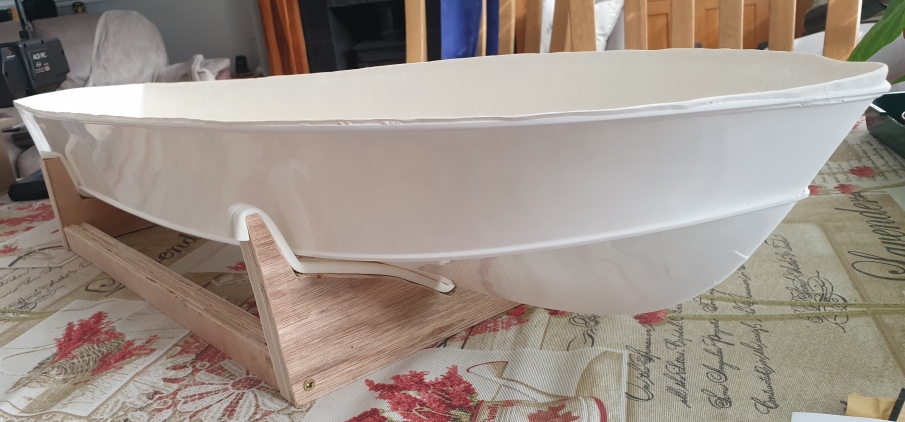
Stand construction
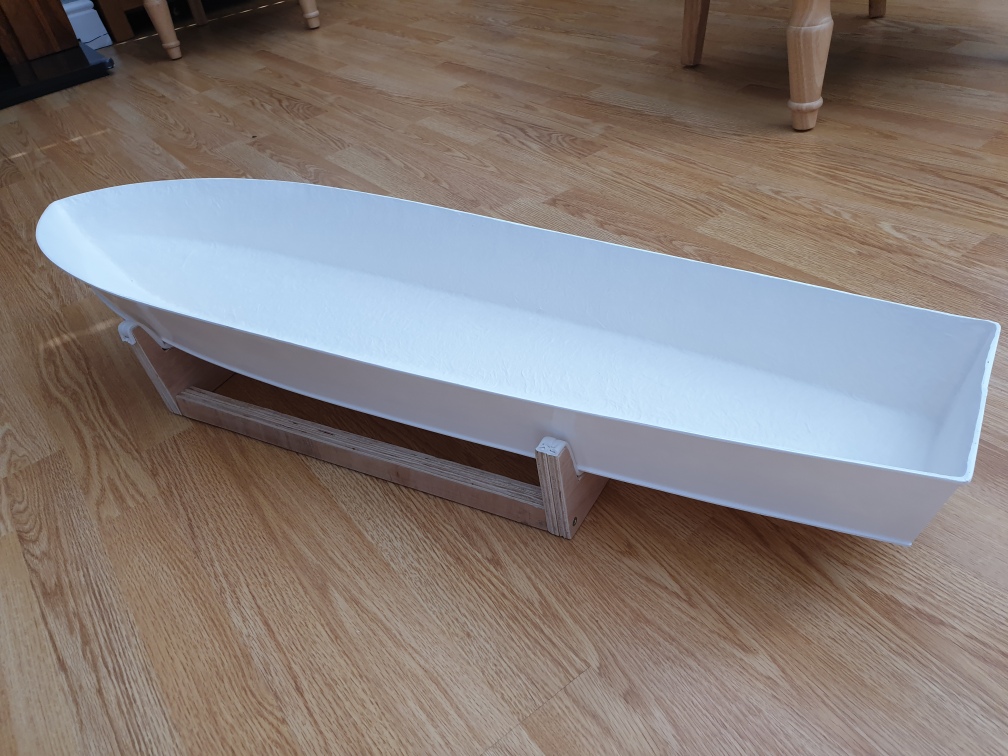
12/09/2023 First things first then. A stand.
Preparation
15/09/2023 After a careful read through the manual and discovering a couple of anomalies in it, I emailed Deans Marine who immediately corrected the oversights and sent me corrected pages in the form of PDF within 24 hours. They told me that they had also corrected all of the manuals in all of the kits they have prepared. Everyone makes errors, it's how you recover from them that matters. Deans Marine appear to be ready and willing to correct problems quickly and efficiently. So far so good.
Today, as per the manual's instructions, I sanded all of the raised edges from the lasered sheets, numbered all of the parts in erasable felt tip (CD marker pens) and popped them out of the sheets. I hasten to add here that the instructions did not recommend removing all of the parts at once. Most of the parts in the laser cut sheets were only held by small tags, with the majority of the lines entirely cut through or almost cut through. Although on one 2mm sheet the lines were only about 50% through the material, leaving quite a tough job to cut through with a knife, especially on the detailed parts. I tried cutting the tags and 'semi-cut' lines with the various modelling knives that I have to discover it is a fairly tough material and heavy going.
However. Experimentation on scrap and examination of one of the sheets revealed a laser cut along the whole length separating a lot of small parts from a fairly large piece of scrap about 3cm wide. Bending very carefully, I noticed that if bent away from the cut, the plastic split very neatly and oddly satisfyingly along the bottom of the cut, leaving just a little bit of sanding needed to tidy it up. I used this technique or variants of it to separate all of the parts from the sheets and am very happy with the results. Using narrow end snips to get close to corners to get straight runs worked well. In my opinion, this was definitely the best way to pop the parts out.
I had thought carefully before removing all of the parts at once and decided go ahead and do it as the parts can be tidied up at leisure instead of doing it as the build progresses (which cannot be started yet as the upgraded propeller shafts need purchasing first). The tiny or fragile parts are left in larger unseparated clumps so they don't get lost or snapped accidentally. The parts are now kept in bags, one for each sheet. I have a spreadsheet of all of the parts with relevant notes. I have kept all of the scrap and will not throw away even the fiddly little bits of it until the model is finished. Keeping the larger bits for the inevitable repairs and extras.
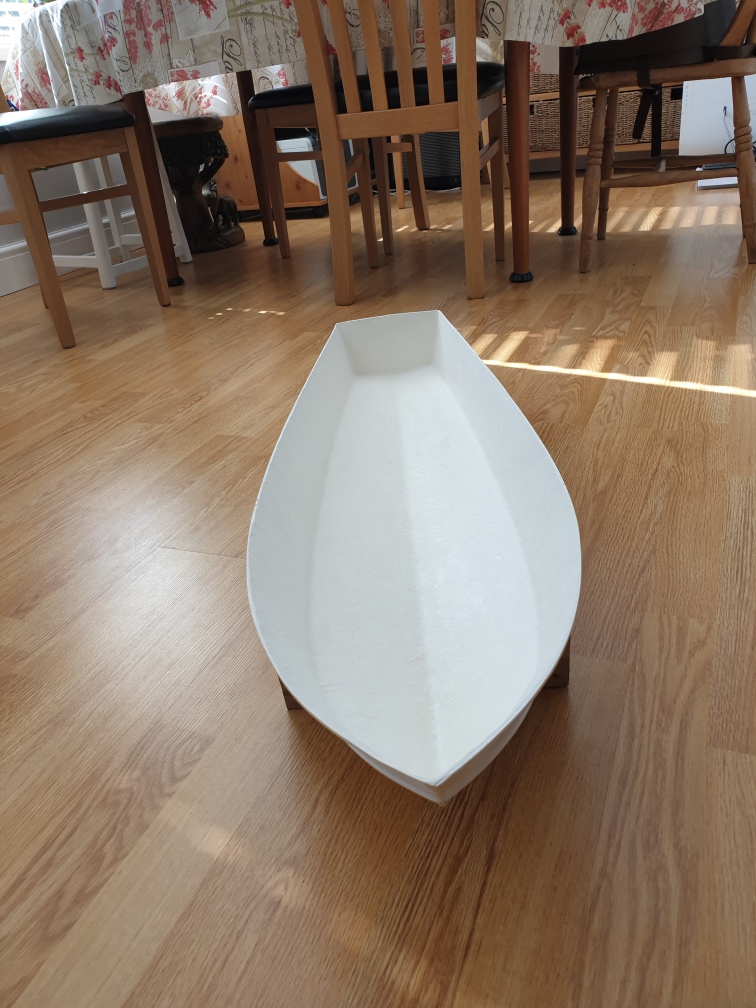
16/09/2023 Sanded down the flash from the hull.
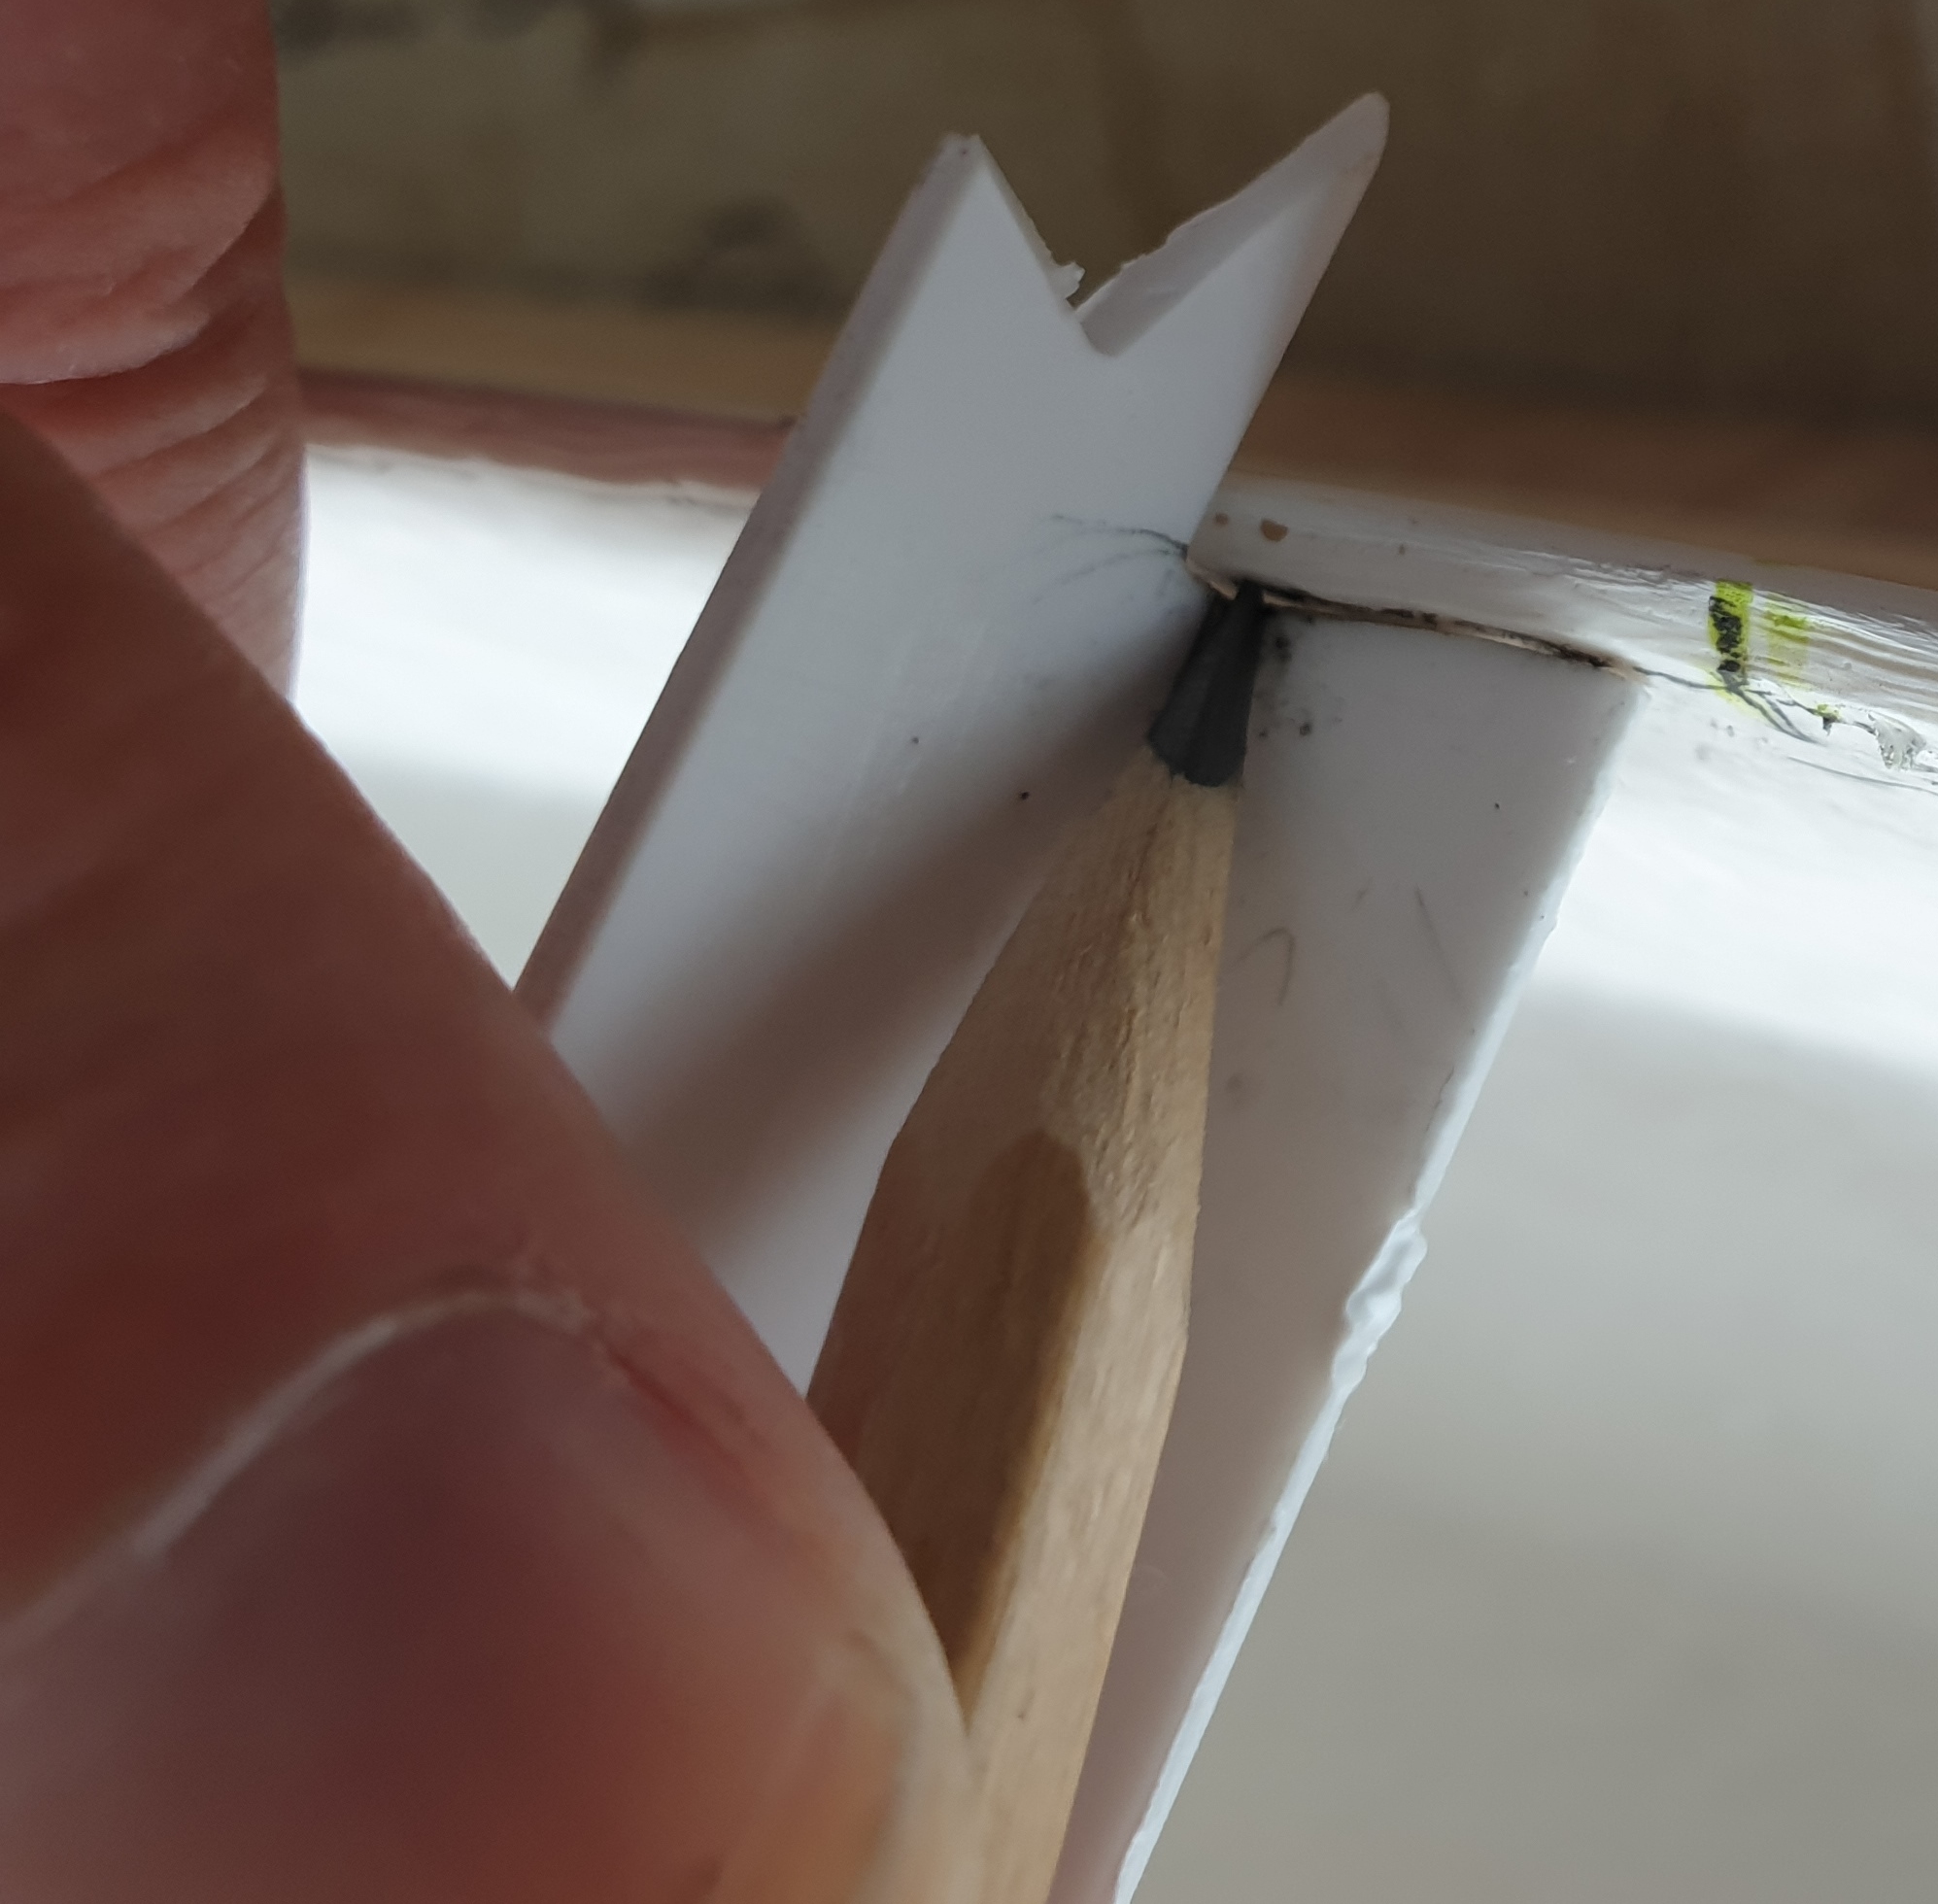
19/09/2023 Finished off a few preparations of the laser cut parts and marked around the edge of the hull for ramin and deck supports. To mark the inside of the hull 2mm down from the top, I stuck together a couple of bits of scrap to make a tool that did the job in a trice:
21/09/2023 Preparations to hull. More trimming to the top edge and drilling/filing/sanding of the various holes. Construction of 2 battery boxes from scrap. Preparation of the external prop shaft supports. The instructions recommend removing the existing pins that pass through the hull, drilling out and insertion of brass wire for extra strength. Improvement to the spreadsheet which has now been compared against the wording of the instructions, part numbers etched into the parts themselves and photographs. It is now possible to easily find any part by the description or part number. I have come across a few anomalies and will wait until I have finished the build before contacting Deans Marine again.
Trial fit
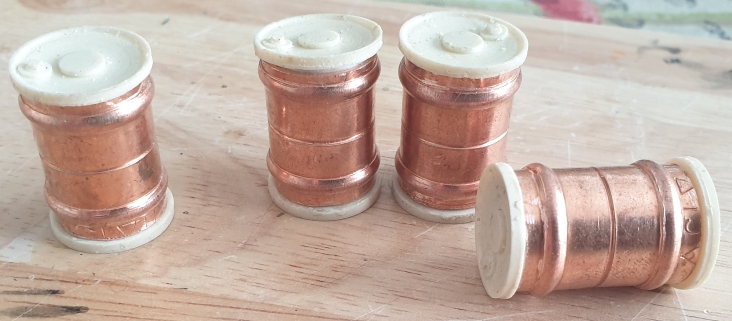
27/09/2023 The depth charge bodies may have been changed as I can find nothing in the instructions about making the depth charges up from the 8 end caps provided. I suspect the two plastic tubes supplied are supposed to be used, however, the tubes are not long enough if they are to be cut into two (which they would need to be as there are four depth charges). Their diameter is too great also. Looking around my collection of stuff, I discovered that straight solder copper pipe fittings were perfect for the job if cut down a little at each end. 1 Tray of components now checked and sanded, 2 to go. Battery boxes lined with some springy plastic packaging rescued from a skip. 31/10/2023 Change of plan regarding the depth charges. Having checked what depth charges are supposed to look like as opposed to what I would like them to look like, I decided to drop the copper joints and get some tubing of the right diameter and length.
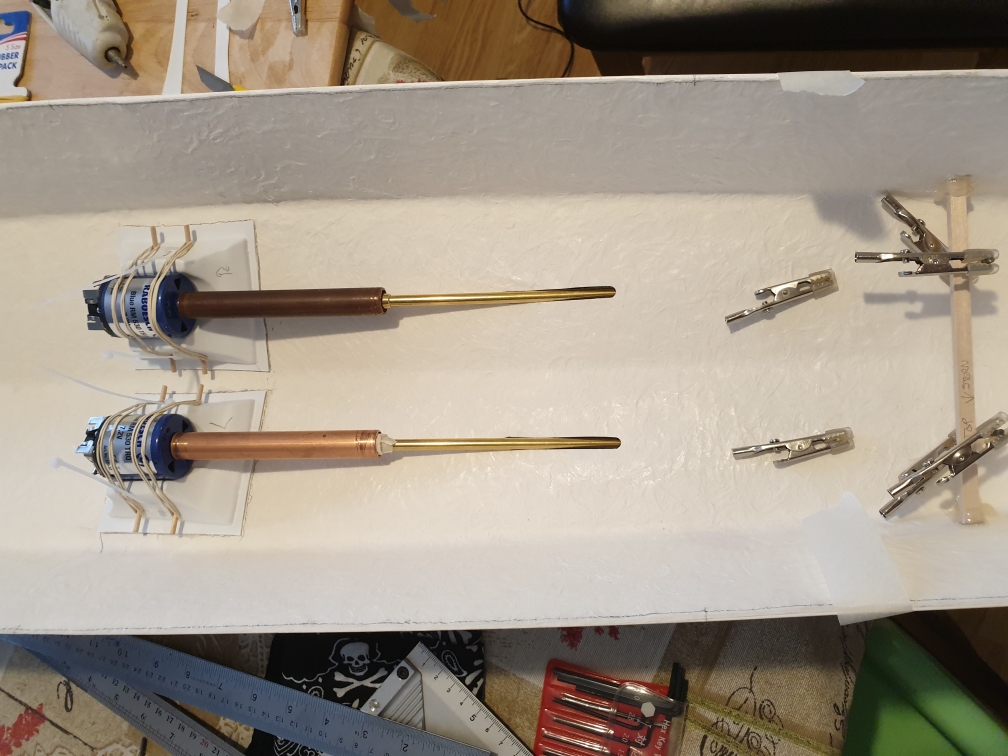
13/10/2023 The propshafts. The measurement chart on the Raboesch website has the overall length and length of the outer propshaft transposed, so the outer casing is longer than the overall length, which is of course impossible in this reality. I contacted Deans Marine about this as they had repeated the error on their website obviously and quite rightly having used the data from Raboesch. I emailed Deans Marine about this who were probably sick of me by now and pointed out the error, they quite simply said, they used the Raboesch data. I emailed Raboesch and as of now, a couple of weeks later, have heard nothing back from them. I am not impressed. However, I placed the order and a couple of days later, the shafts and props arrived, looking good. The instructions included didn't directly refer to the particular ones I had bought (301-26) but the images in the instructions gave a hint as to how to put them together, admittedly not difficult, just slightly annoying as they were not cheap. Also, the two supposedly identical shafts came with slightly different fittings packs. There were two grub screws in one pack with just one in the other. I wonder how many there should have been. One pack had a brass washer and the other a steel washer (or maybe stainless), I sent off to ebay for another brass washer. Again, not complaining but doesn't bode well for Raboesch's quality control.
At last! The propshafts and props arriving allowed the commencement proper of the build. Copper pipe and a little masking tape worked as a good lining up tool.
16 10 2023 Ready for fixing in properly. Wiring to sort out, have ordered some extension cables for the servo/ESC.
21 10 2023 One thing leading to another has caused a change of plan. The ESC I have (Viper Marine 20) is no longer in production apparently. The plan was to add a second of these ESCs at a later date. The reason as mentioned earlier is finances. However, just in case supplies run out, I ordered one from Ebay and while I was at it ordered the second set of batteries too. I think this is about most of the propulsion sorted out. Not all of the electronics though as I want to add a couple of little extras, more on that later. Having decided to replace the rudder tiller arms a visit to Just Kits was in order, they happened to have a reasonably priced transmitter in stock so the rest of this month's pocket money ended up in their till.
I then discovered the wonders of modern controllers, realising that I had stumbled upon the ideal solution. Build the model for dual control and turn it into single stick control in software. Swapping to dual stick control with a couple of taps on the linked mobile. :-)
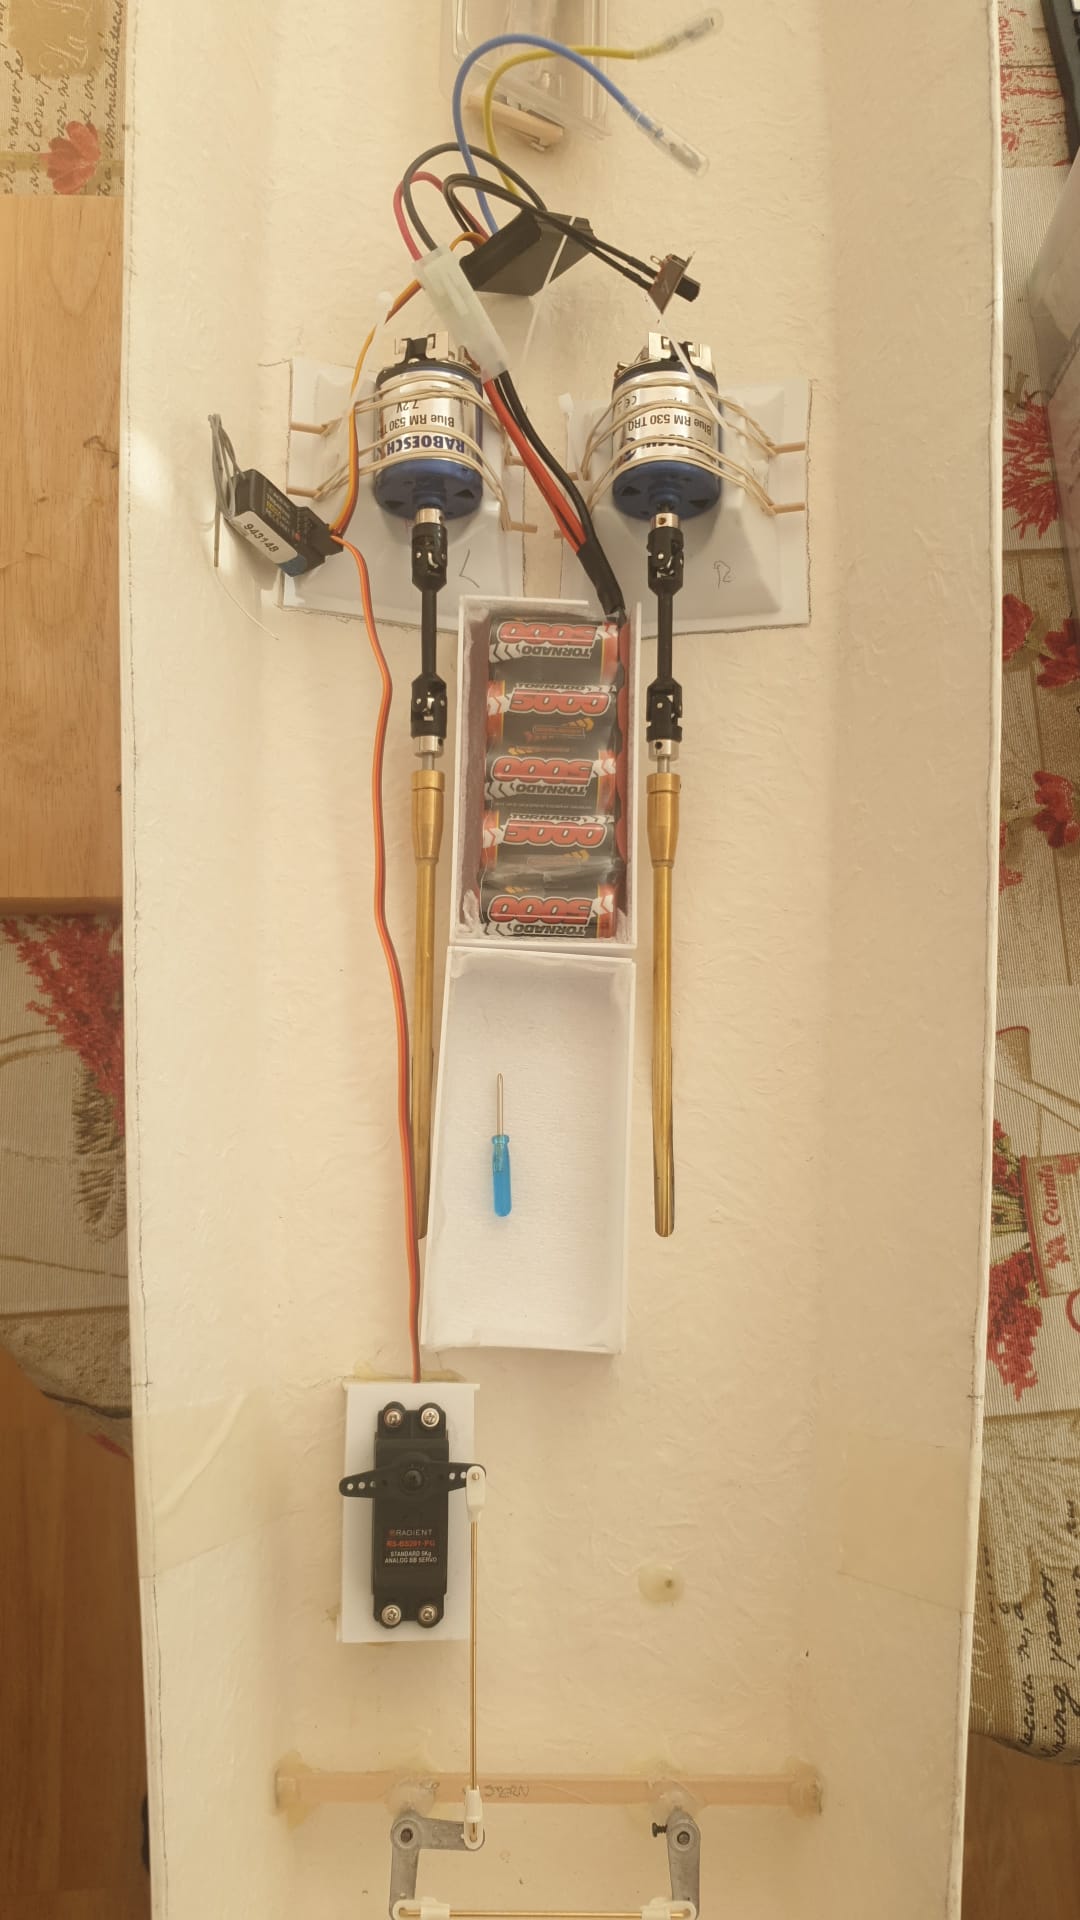
So this is the progress so far then:
23 10 2023 A few bits arrived in the post today and I finished sanding the prop shaft filler on the underside of the hull. Some nice nylon washers for the top and bottom of the rudder tubes, new tiller arms all fitted. The second battery pack arrived but still awaiting the second ESC so only one motor powering. For some unknown reason I had left the motor setting in reverse in software and in the first test in the bath below, I changed the wiring rather than flip the software switch via my mobile. I did that after this video was finished. My long suffering wife who was videoing had cleared off by then.
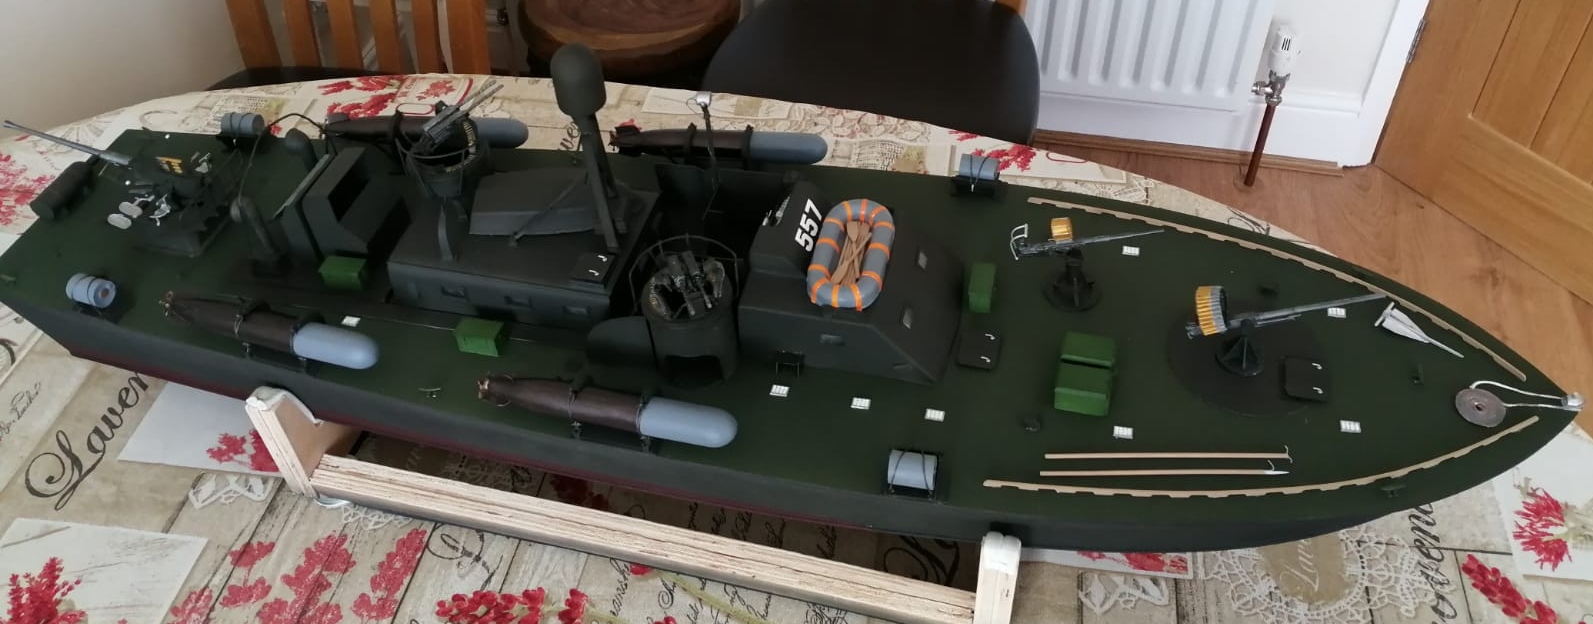
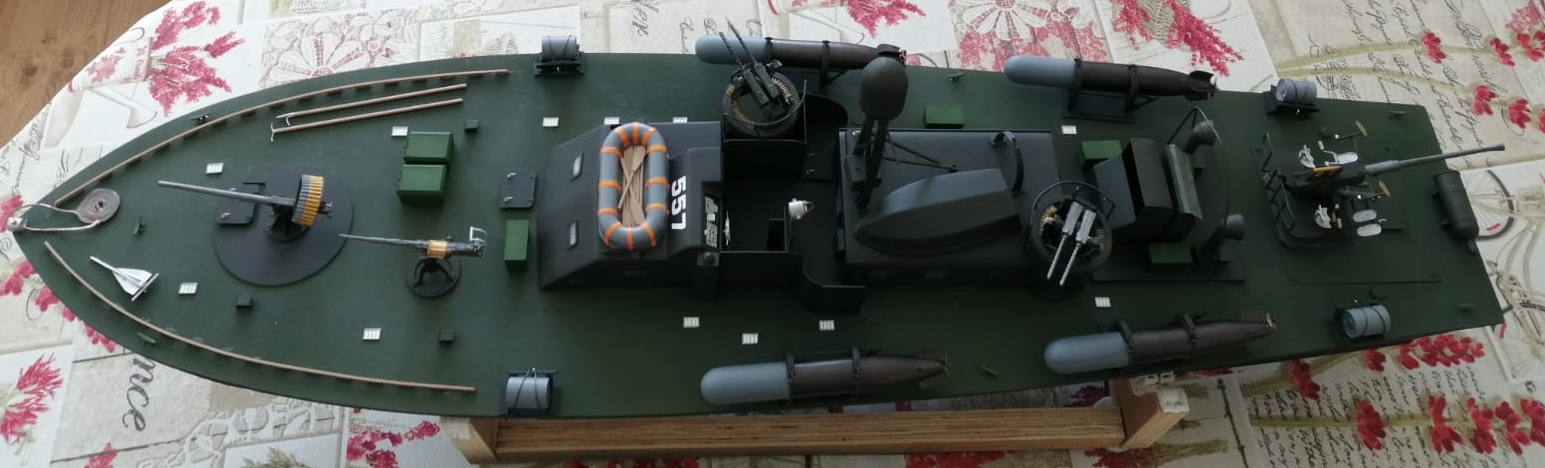
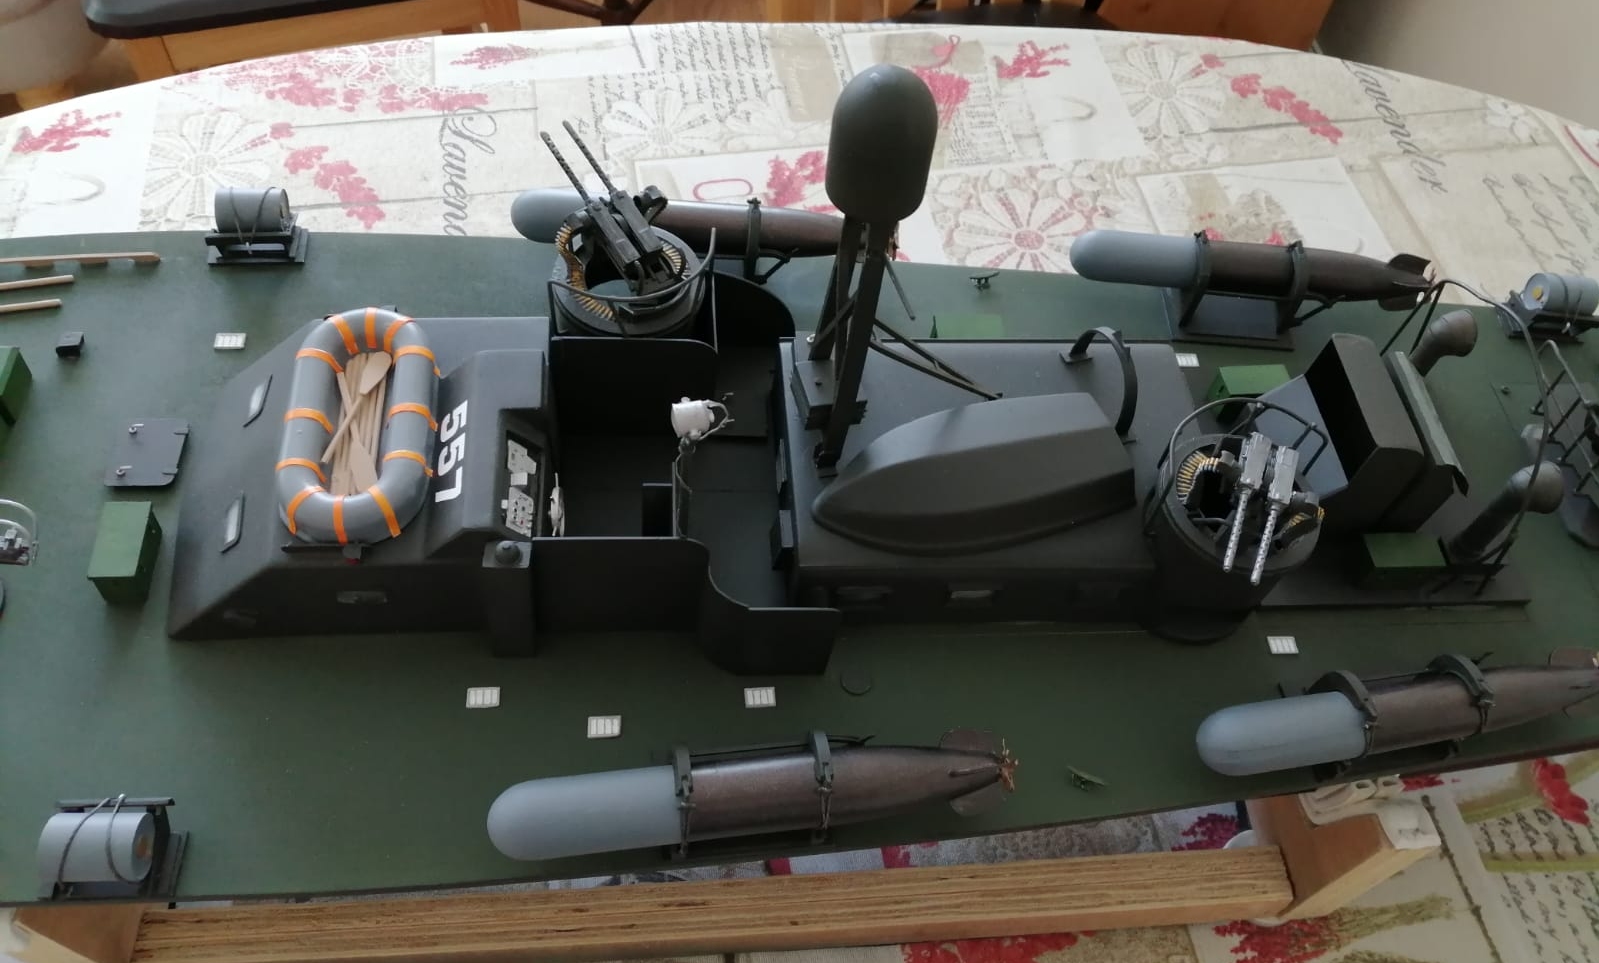
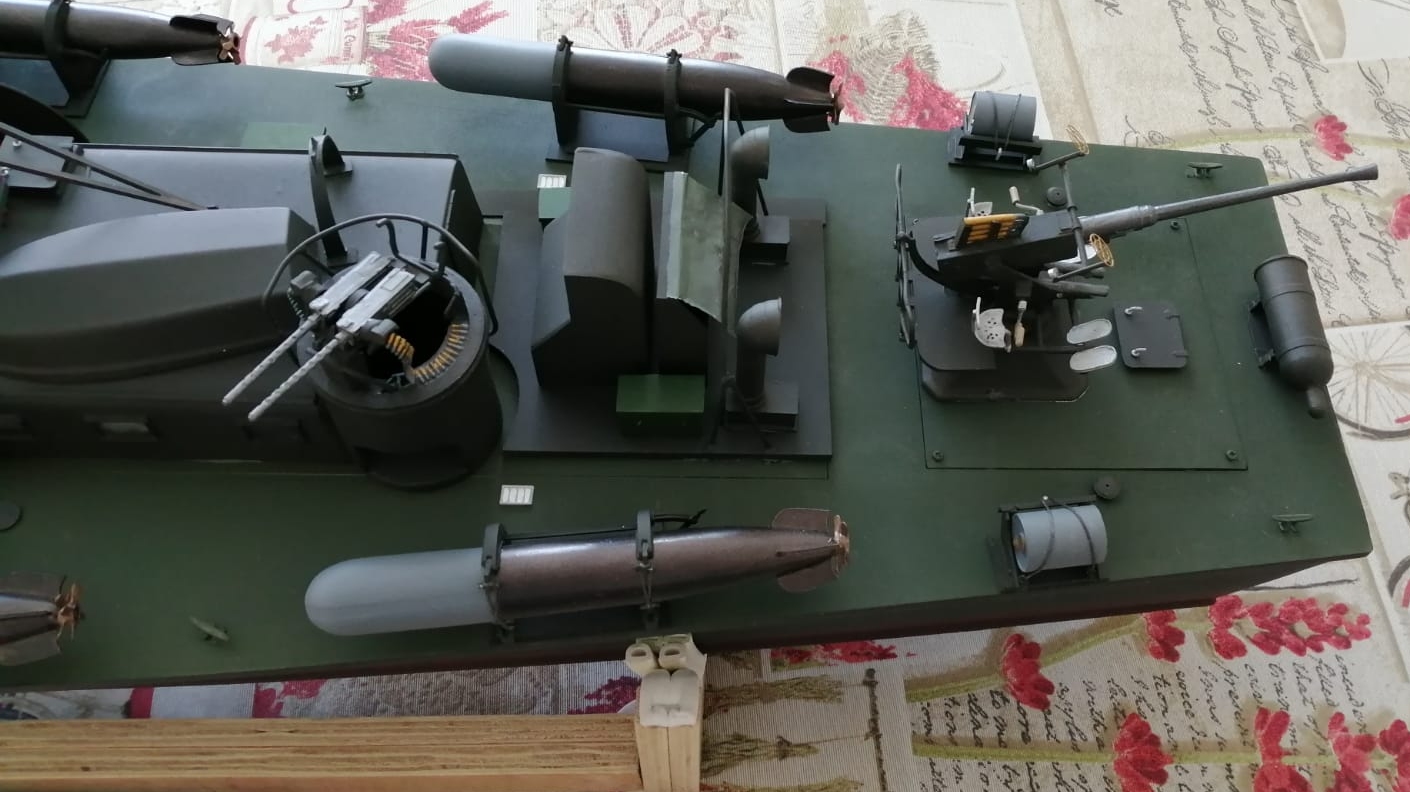
31/10/2023 Engine room intake and 40mm locker made up. A tracing of the plan made to lay on deck to help with positioning of stuff. Open bridge platform fathomed out and taped together for positioning. Bofors gun constructed. There is an ejector chute mentioned in the written instructions whether this is the same item called the ammo chute earlier in the instructions, or a separate item, I am not sure, although after looking at a plan from another kit, there is something like an ejector chute on the back of the breech. There is a spare part left over in the bag that might be something to do with it. Then, to get an idea of how it's all going, I balanced a lot of it together. Quite pleased with the results so far.


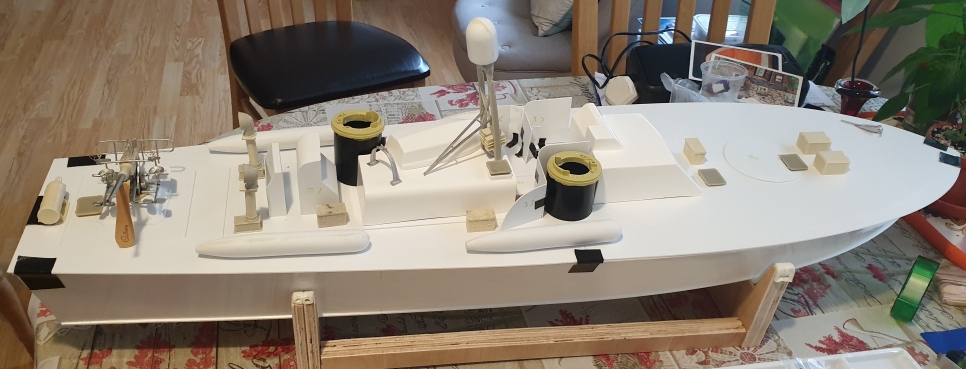
I have made a few models over my nearly 68 years. Some kits present more challenges than others. I have had far more puzzling kits than this one, this has had me scratching my head a few times. I do think that the stage where most of the fathoming out is now complete. Don't get me wrong, The fathoming out bit is really enjoyable.
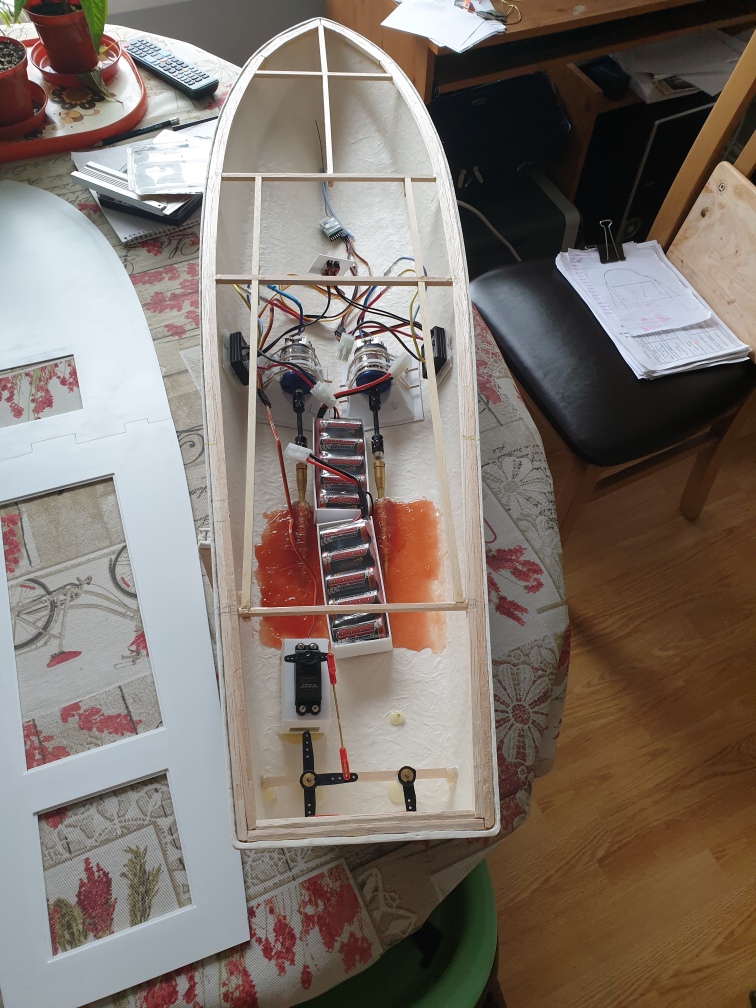
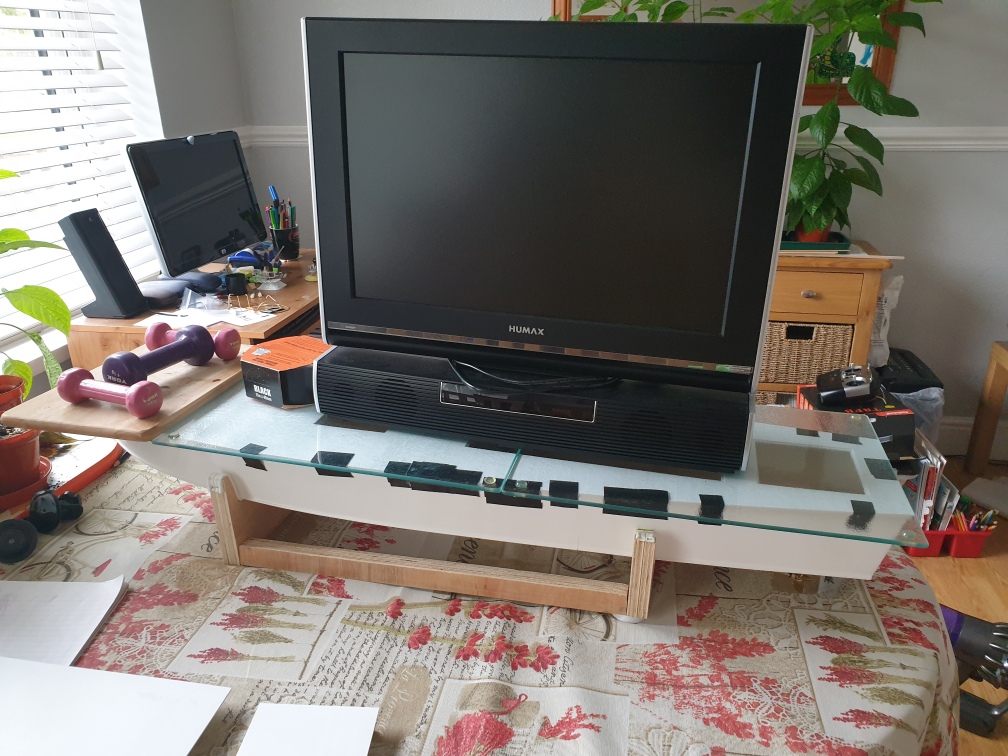
04 11 2023 Depth charges and mountings completed. Soldering of brass rods for 40mm preventer rail and .5" mount preventer rails. Second ESC fitted. Switches for both motors linked by mounting them together on a board. Internals now complete apart from fixing the battery boxes and radio into position ( This will be done when the boat is complete to get the balance point correct). Deck stuck in place with Evo Stick Seriously Strong Stuff Ultimate Adhesive. Weighted down with stuff stolen from the kitchen, a TV that was to hand and some stuff plundered from my wife.
Before and after
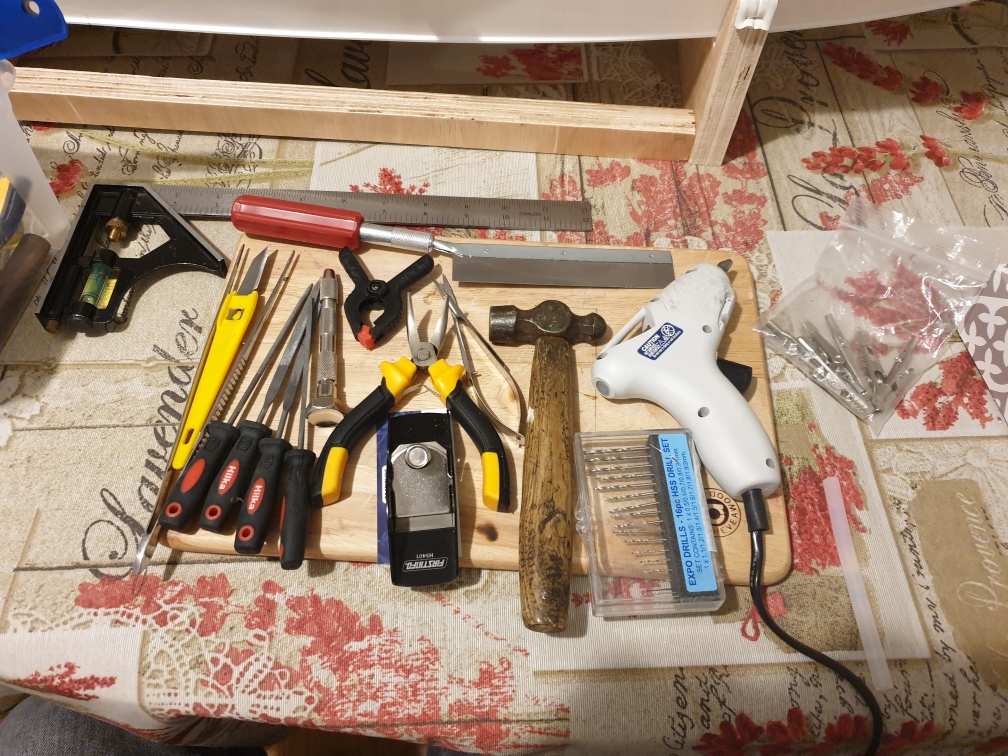
Some of the tools
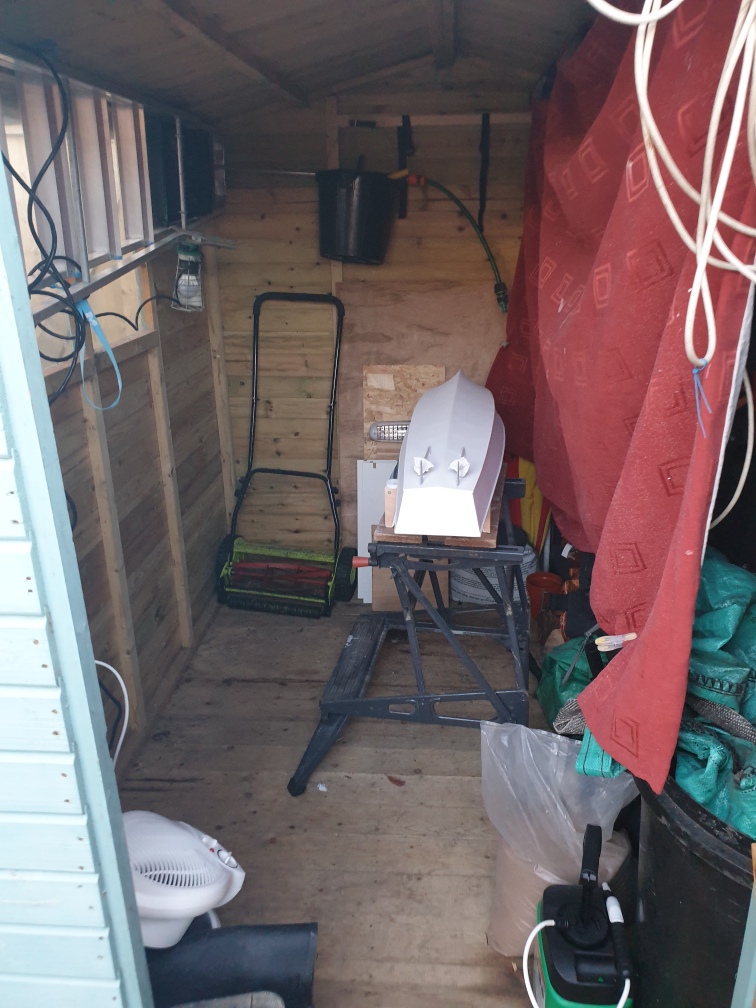
12 11 2023 Since buying an airbrush, I have up to now only sprayed tiny models in the utility room of my house using a cardboard spray booth I made. Recently, the utility room has been redone and so the boss would not look kindly upon paint being liberally splattered over the new cupboards (not that I do that of course). I tried spraying outside but that was an abysmal failure so I used the shed.
All went well for the first four top ups of paint in the reservoir. Then came a problem I have not experienced before, having previously only done small jobs lasting only a couple of minutes. Yes, you guessed it, clogging. Splatters all over what was a beautiful job. Out came the Isopropyl alcohol and kitchen roll to wipe the hull clean again. Redo, this time with clean ups of the airbrush after the first refill.
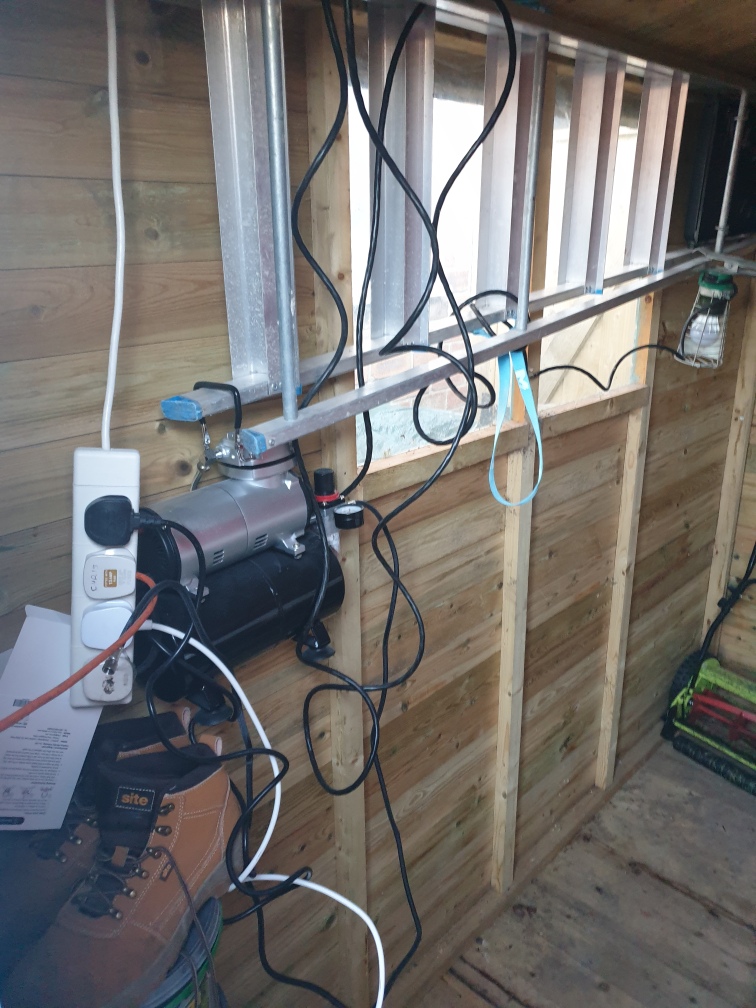
This is my dirt cheap Fengda FE-186K that has served me faithfully for several years:

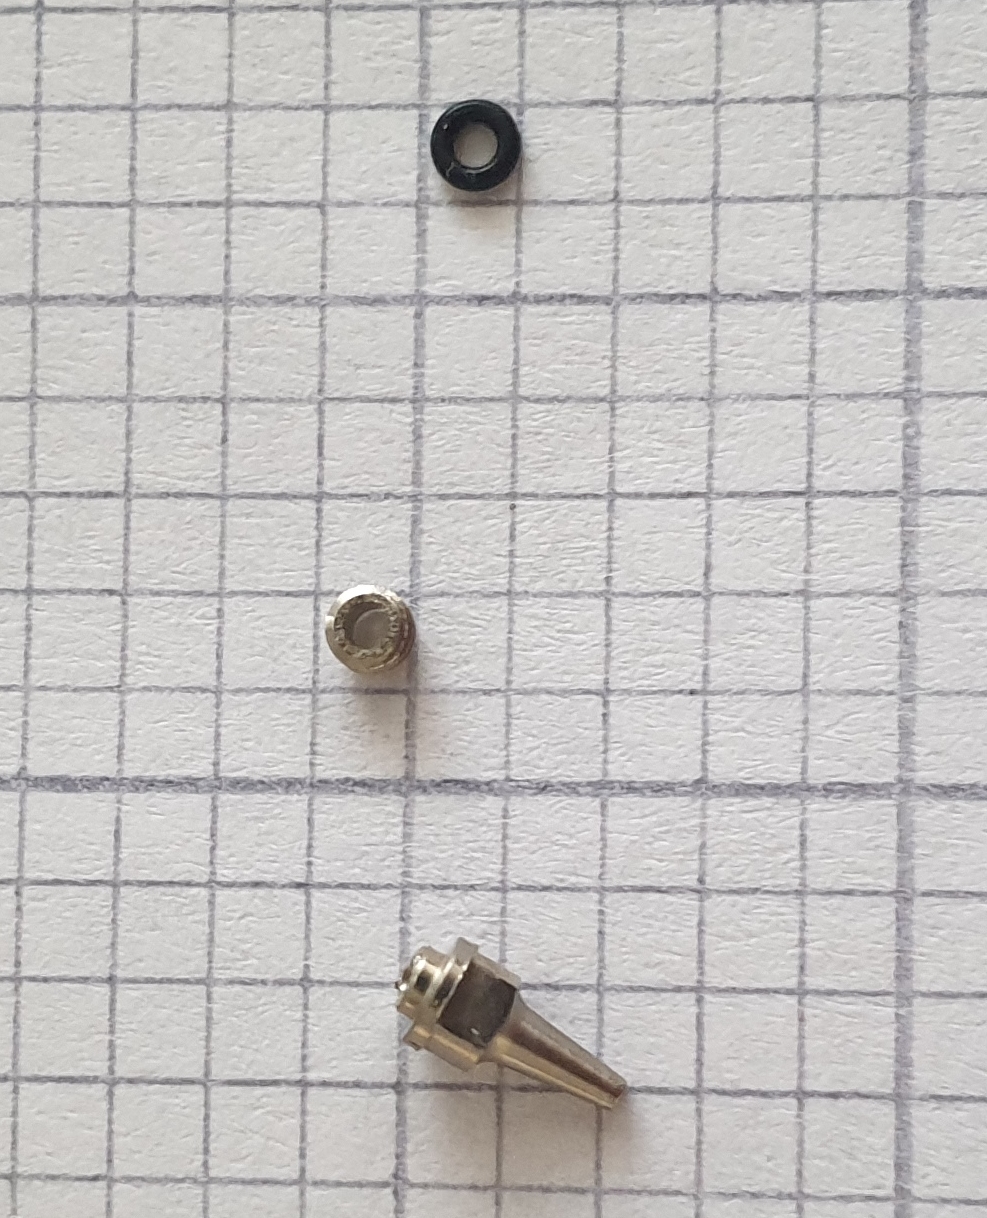
Previously all my spraying has been done with the .3 nozzle and needle. However, because of the size of the job, I thought I would fit the .5 nozzle and needle. This had never been used before. It worked fine until the first time I unscrewed it for cleaning, when the end fell off, leaving the body of the thread inside the airbrush. Now I know what you are thinking, over tightening on insertion, obviously it must have been but it was only put in finger tight and I have spent many years learning how to tighten stuff up carefully, on top of the fact that the .3 nozzle has never suffered this fate. Anyhow, fortunately, the threaded part was easy enough to remove teasing it out with a tiny drill bit. The .3 setup was used to do the job then.
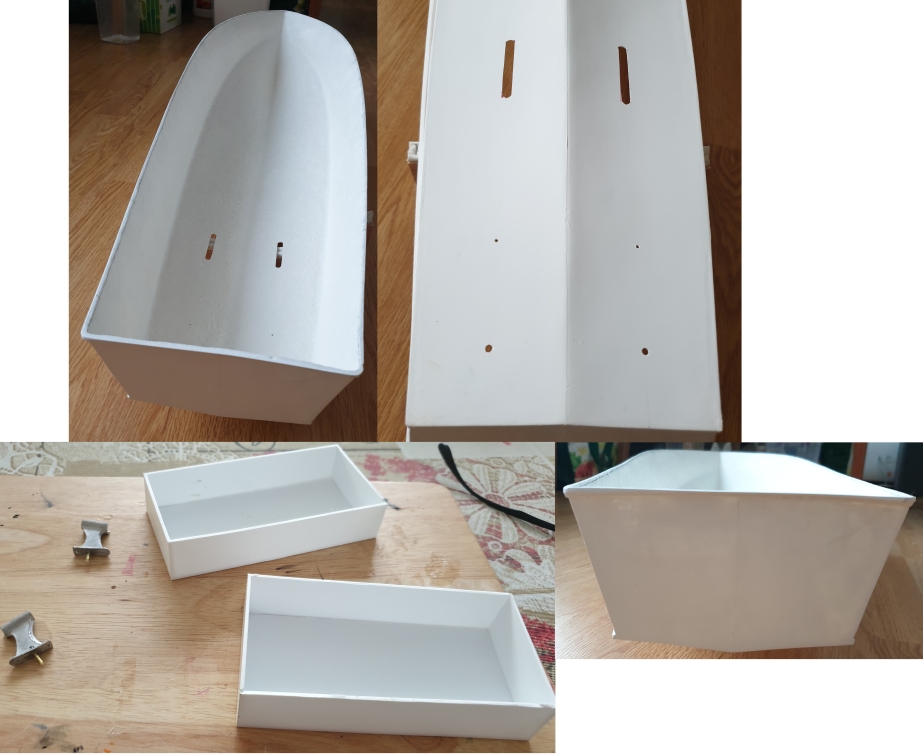
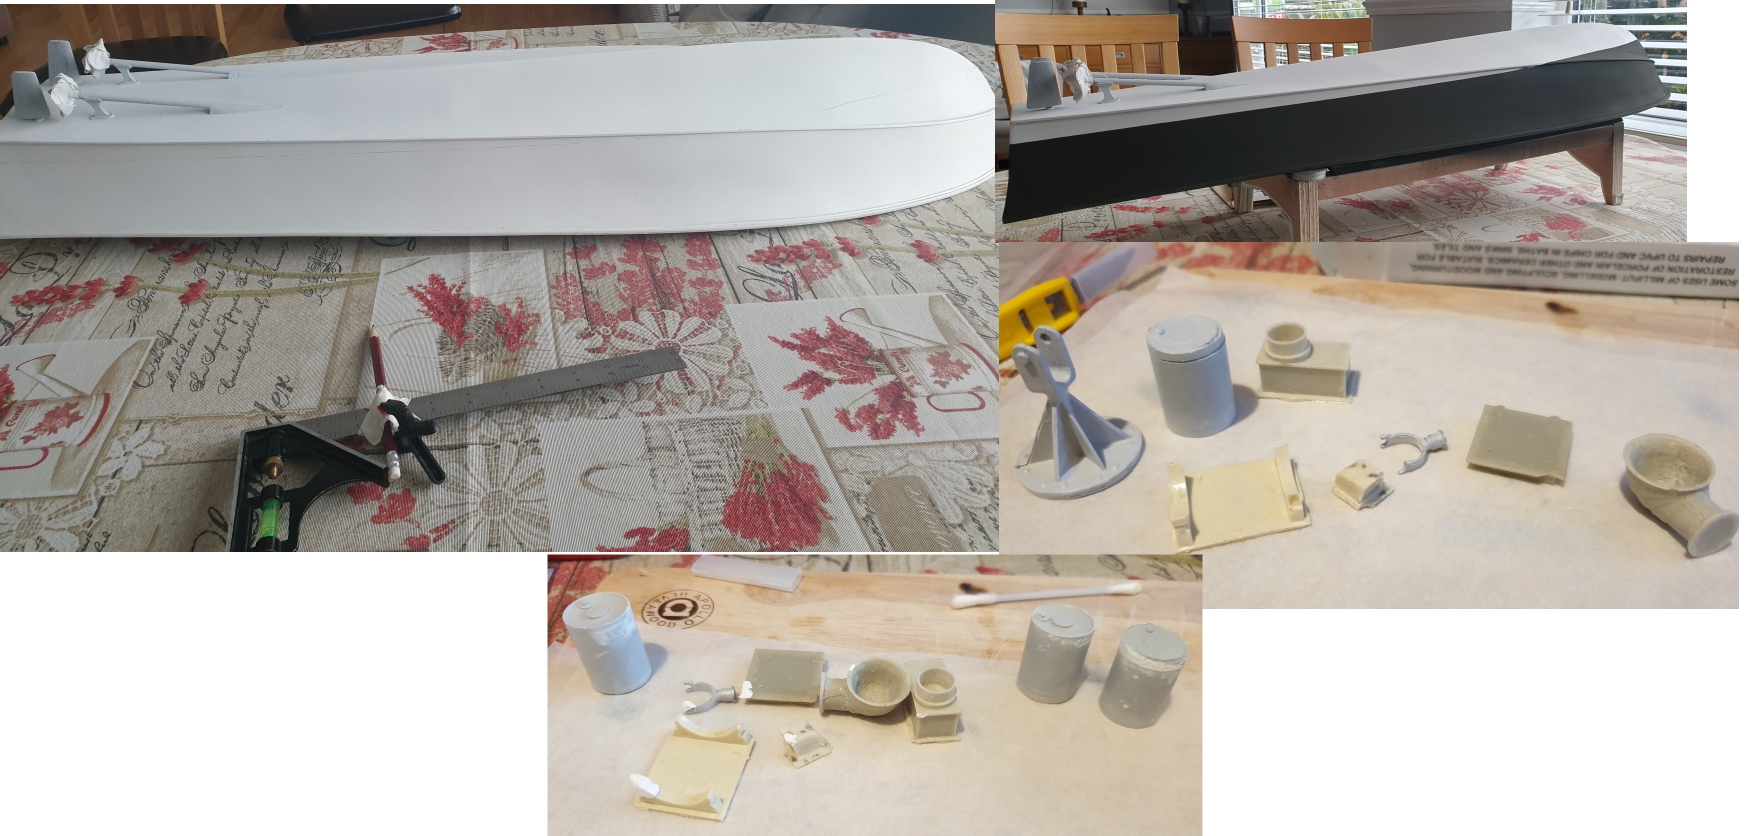
22/11/2023 Ten days, a little progress. Below are a few snaps cobbled together into one image. Top left shows how I drew the line on the hull, propping up the stern so it was level but upside down using an adjustable square with a pencil strapped to it. To the right of that is the dark green sprayed onto it ready for masking, I am in the process now of spraying the lower part of the hull (Tamiya Hull Red) but that is not fit to show yet. Below that are all the parts that needed attention, some caused by my ham fistedness, some that arrived that way. The lower image shows those parts with filler ready to shape. Actually, there were other parts, mainly castings that had air bubbles on the surface. Fixed by dotting with super glue and dusting with baking powder then smoothing. The gun mounting broke as I was sanding the base, fixed by cutting a bit of scrap as a replacement fin, I smashed a depth charge end by being a bit enthusiastic in placing it into a tube. I re-manufactured it with a bluetack mould and epoxy resin. Spraying moved back to outside as the shed was not appropriate for it. Too much paint fug even with the door open, just have to wait for wind free and dry days.
Most of the parts now primed and ready. I may let the grand kids at it with those crayons :-o
08/12/2023 Some images from the last few days. Here is a fix I was quite pleased with. The spotlight bracket had a piece missing and so I added it using a mold made from the good side and epoxy.
The weather has been a bit rough recently and with other things to do, spraying the hull and superstructure has been intermittent. I finally managed to get the hull sorted.

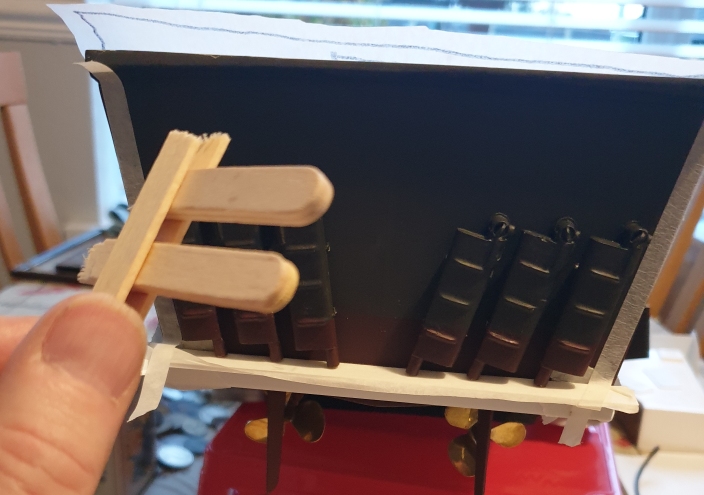
After getting the hull sprayed, positioning and fitting the exhaust system was helped by lolly sticks.
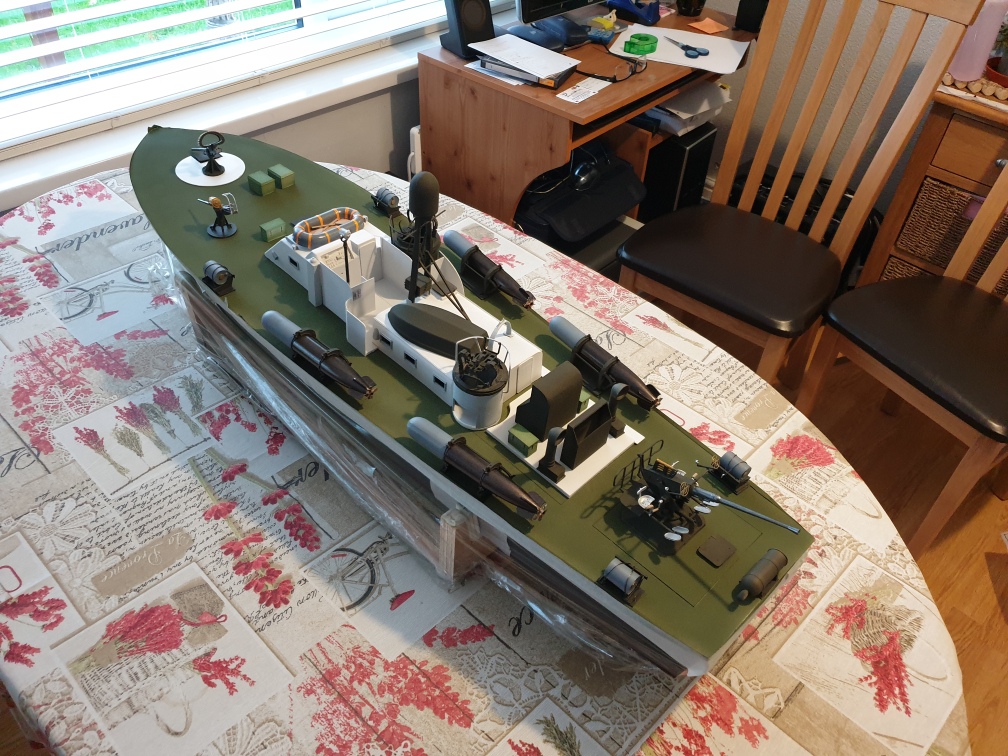
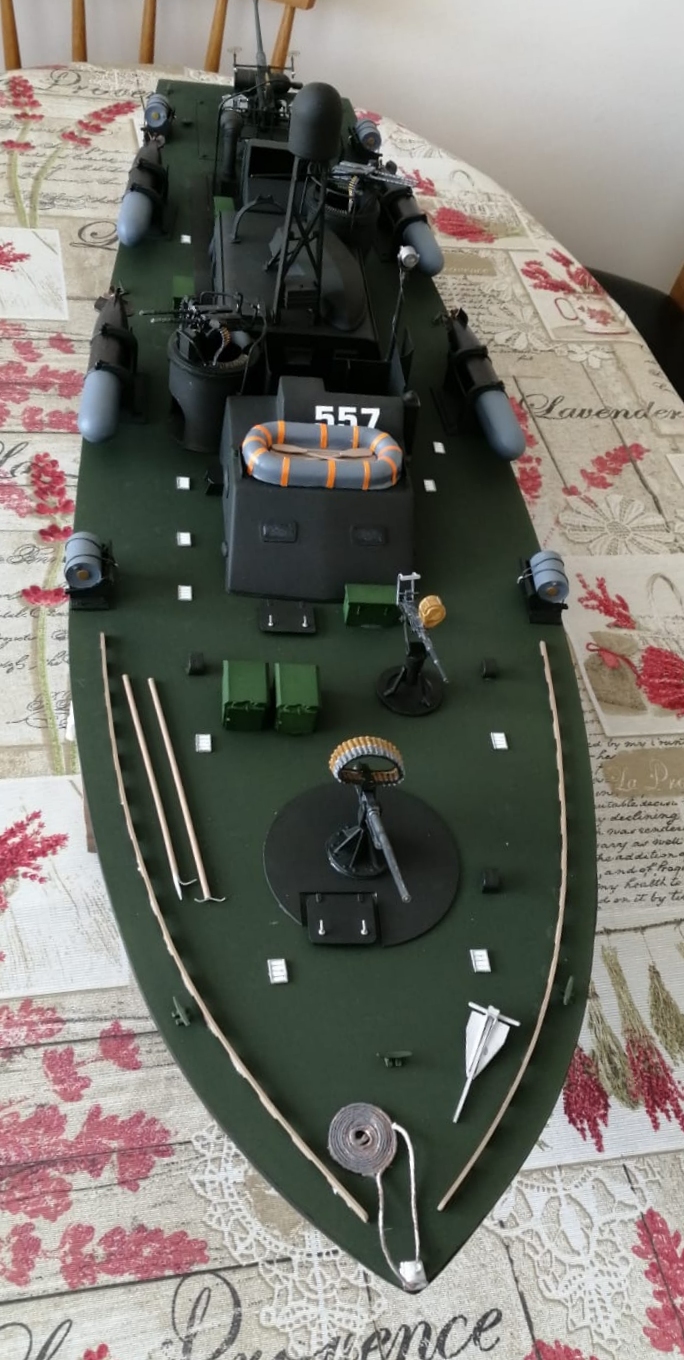
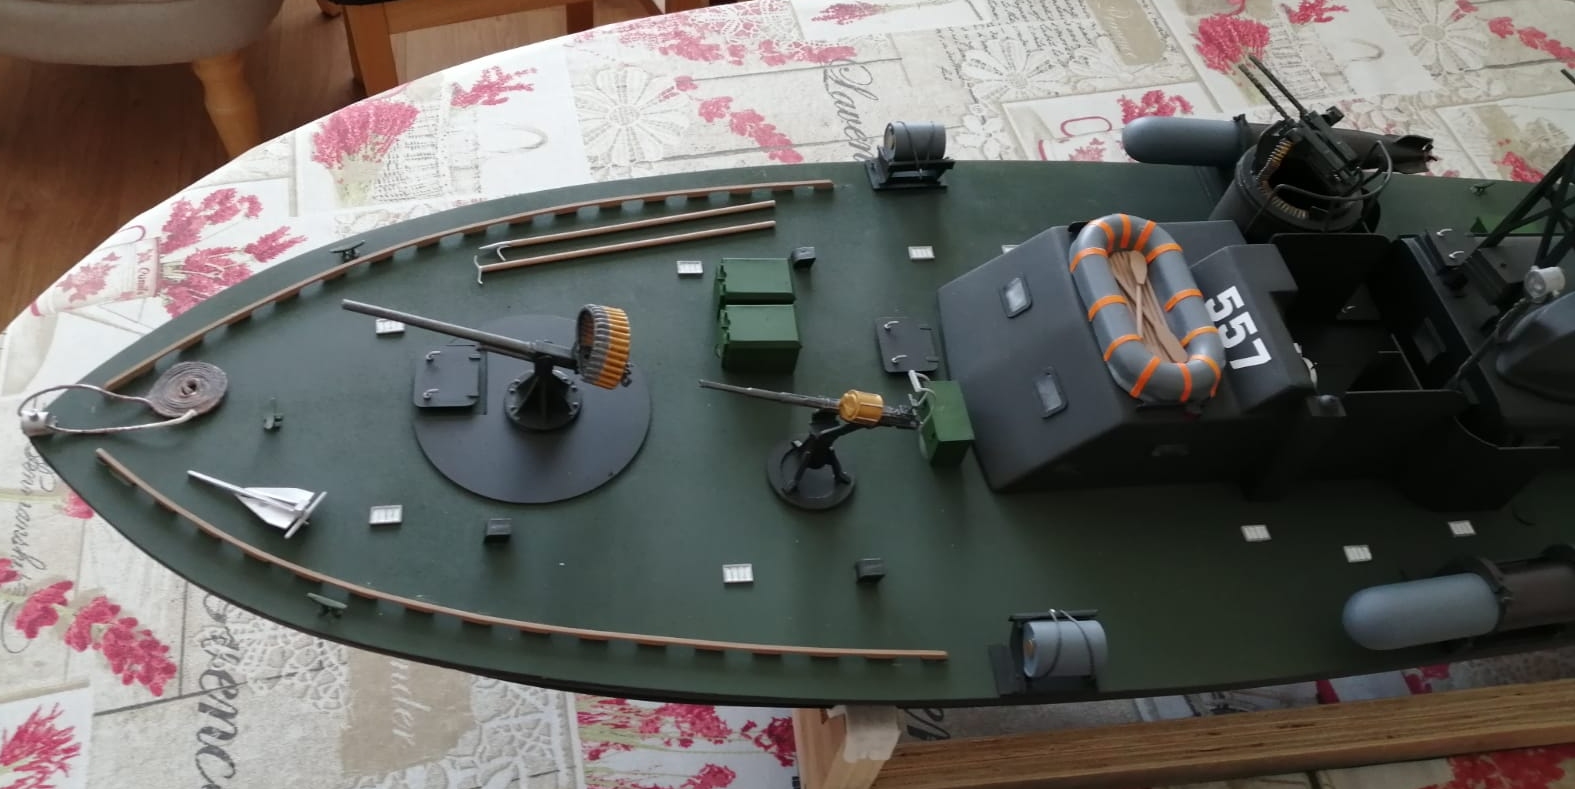
Balanced together with the deck spraying incomplete and a lot of fiddly little bits to place.
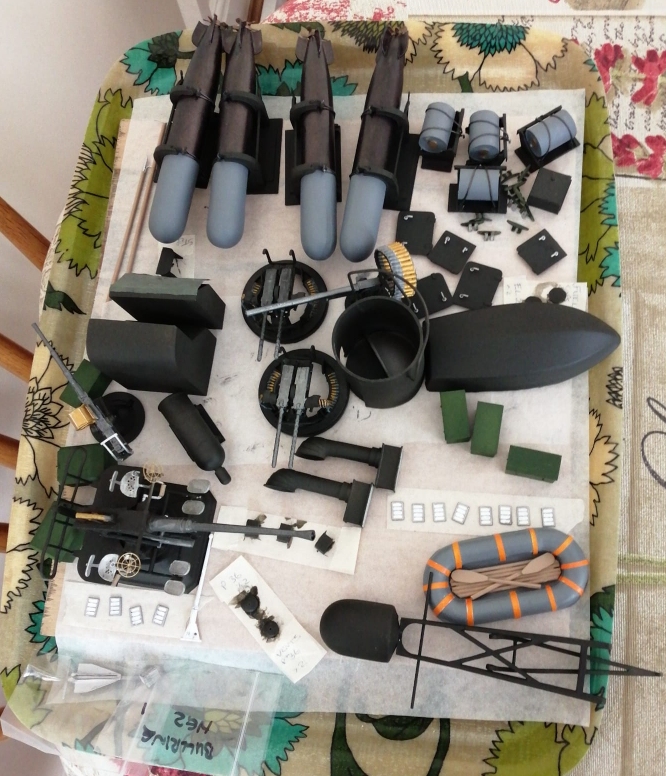
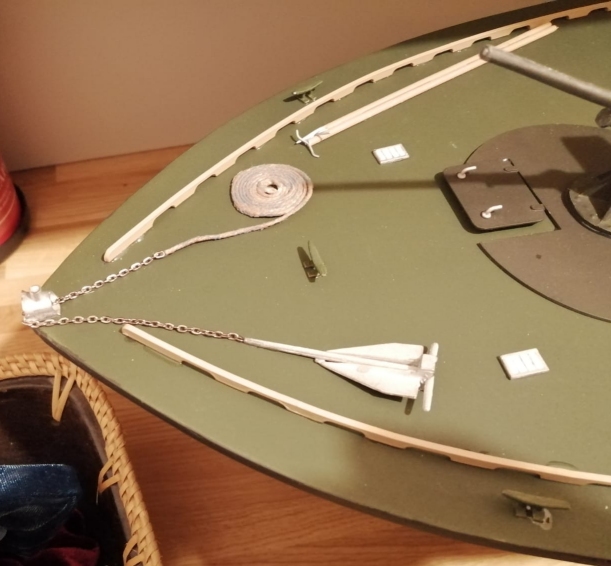
26/03/2024 Many things have got in the way of modelling for the last 3 months. Not least the weather. Whenever I had free time it was too wet, windy or humid. All the parts are coloured in awaiting fixing into place once the hull and deck are finished. Many finishing touches added such as a coil of rope for the anchor. Finally this morning a top coat of flat varnish. The bits should be ready for final assembly in a week or so. While spraying colour on the deck a month or so ago, one hazard of spraying outside presented itself when a bird voided itself right onto the deck of the boat! Very fortunately it kept its mess in the hole in the deck which was masked off, so all the mess ended up on masking tape. Now that was lucky.
01/04/2024 Placing the vinyl number stickers onto the hull was always going to be troublesome as I assume you cannot varnish over vinyl (didn't even try it as it specifically stated it on the spray can). Tried sticking them on to the varnished hull anyway. No chance. So I made a stencil using the original decals as a pattern and dabbed the numbers on in white with a sponge, re-coating by brush.
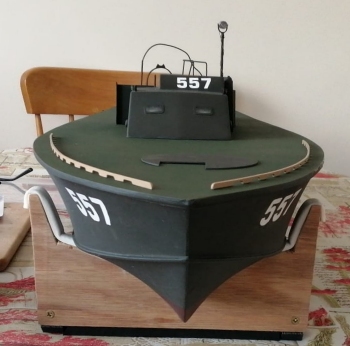
05 April 2024 Almost finished. Everything except the boat hooks and anchor rope affixed. Just the ballast to sort out once the adhesives have cured. That will hopefully be done by positioning and fixing the batteries as required.
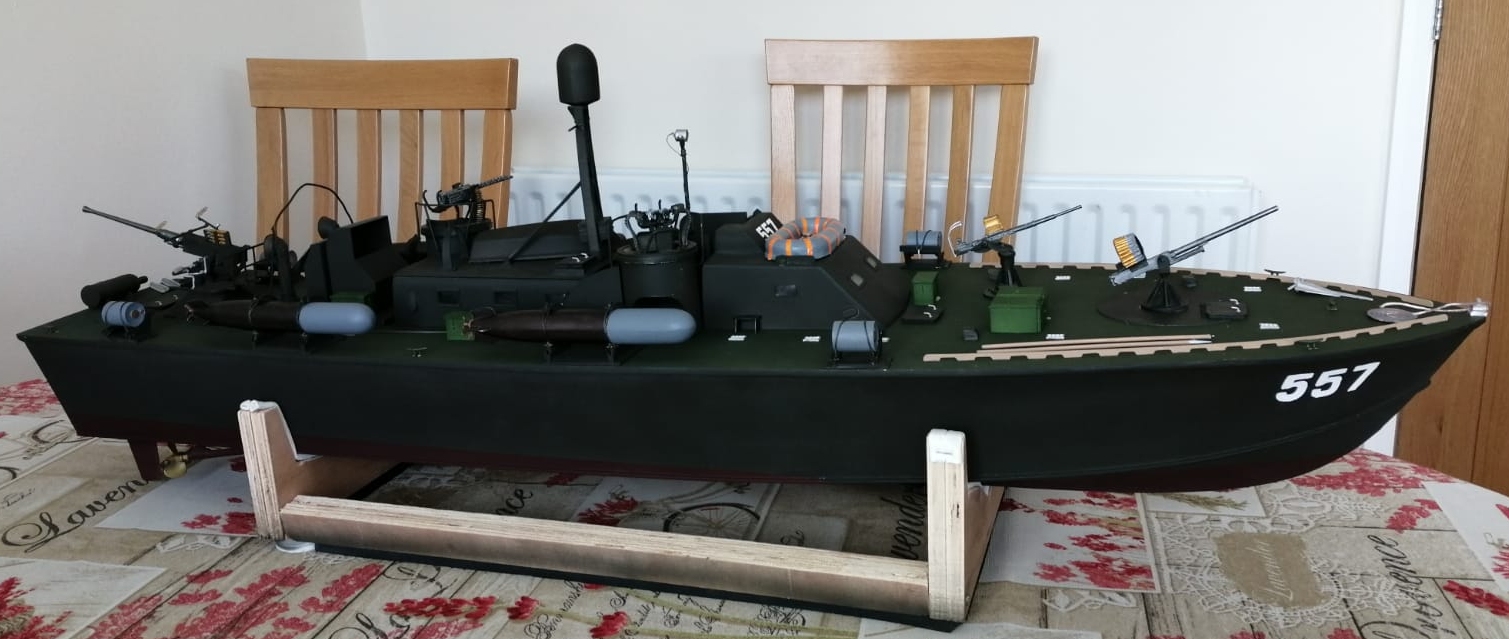

11/04/2024 Added anchor chain and rope, affixed the boathooks.
22 May 2024 The finishing touches. Mark the balance point

Balance point corrected with lead weights in the stern

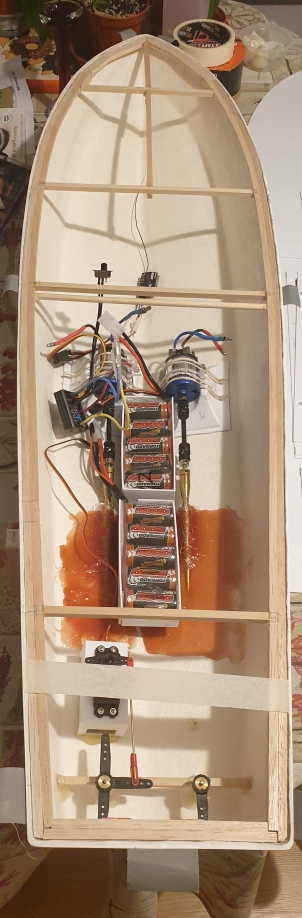
Battery mounts fiberglassed in

Batteries fixed in place

Other minor repairs carried out after damage caused by ham fistedness during construction, straightening of gun barrels and the like
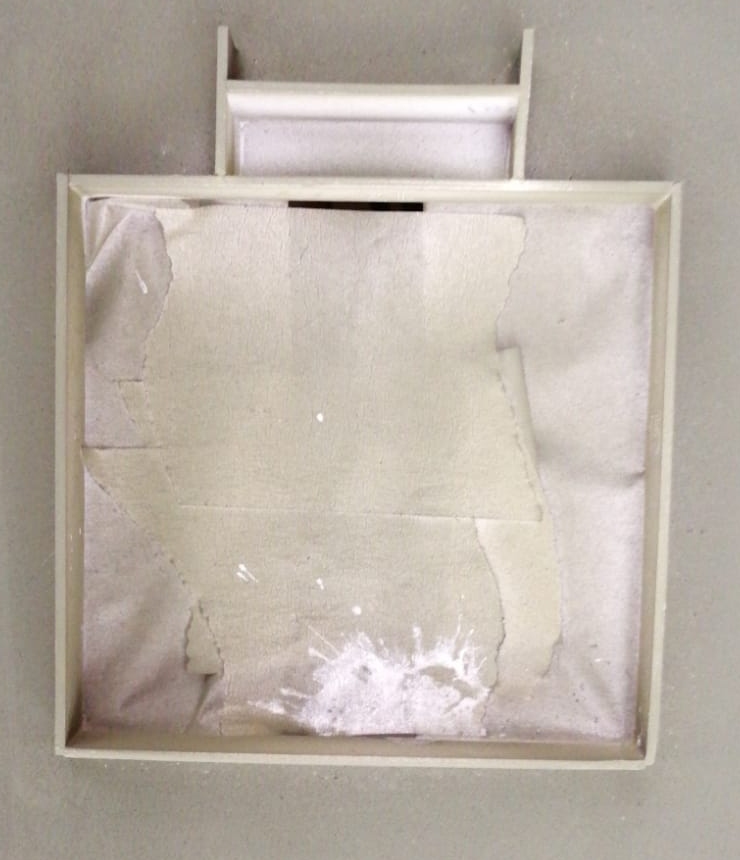
23 May 2024 Flotation device experimented with. Inflating resealable bags with cold air. They have remained inflated for many hours 5 of which fit nicely into the bows of the boat. They are easily checked and easily replaced, allowing easy access still to the bows and its contents. Amongst a few ideas I contemplated, such a polystyrene or rigid foam, expanding foam was one but know that can be a problem if not installed properly with uneven filling and overfilling being a bit of a nightmare.

