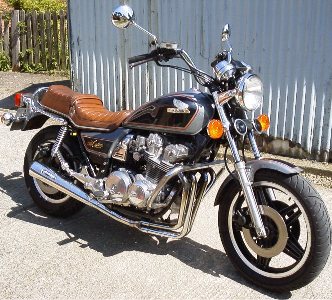
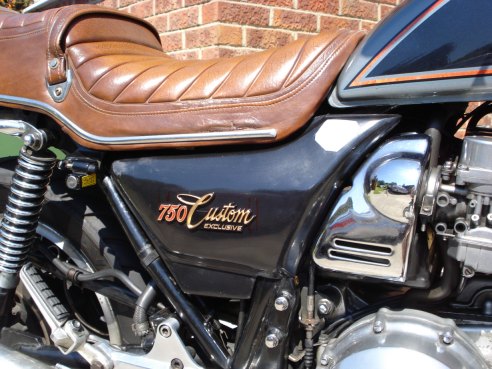
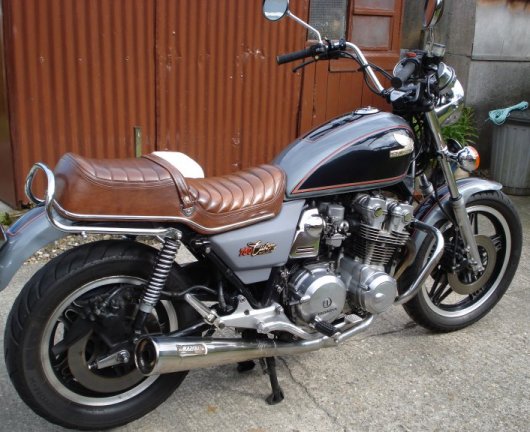
1980 CB750 Custom Exclusive
Side Panel Disaster
 24/04/2009 I went on a ride, got back and noticed the right side panel was not there. I immediately went out and retraced my route in both directions. Over the next couple of weeks, I drove, cycled and walked the 17 mile route more than 20 times but did not find it. Below is a GPS track I made on one of my searches running over the exact route I took, both ways.
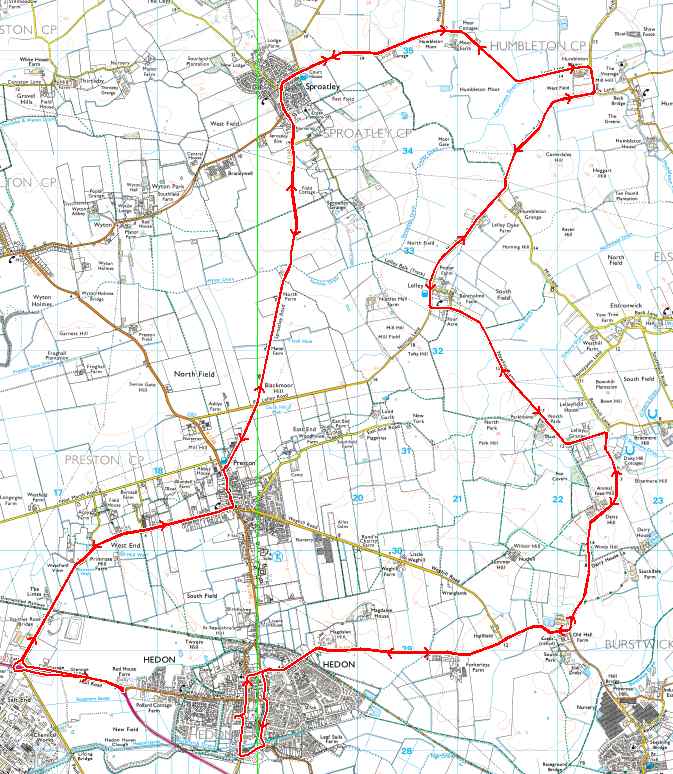
This of course should never have happened as I had received a warning a couple of years previously when the left panel blew off. I was very lucky and found that. What I should then have done was to replace the rubber grommets that hold them in place AND tie the panels in place too.
It was a nightmare from the off. I paid for a search of supposedly over 200 second hand dealers. That came up with nothing. I asked on various message boards. Watched eBay. Nothing.
This particular model of the Honda CB750 is quite rare. A lot of the parts are easily found but some, the more distinguishing parts, are impossible to find. The side panel of the CB750 Custom is the same as mine but a different colour. The badge for the side panel is unique to that particular model of which there were only 1200 made so I understand.
Eventually, I discovered a website in Australia that advertised side panels for the Honda CB750 Custom Exclusive. Not originals but made to order. Unfortunately, there was no way to contact 'Replico' other than telephone. I checked the price of phone calls from the UK to Aussie and it was 38p a minute, so I would have to talk fast to keep the costs down.
I rang Replico, they did indeed make panels for my bike so I ordered one.
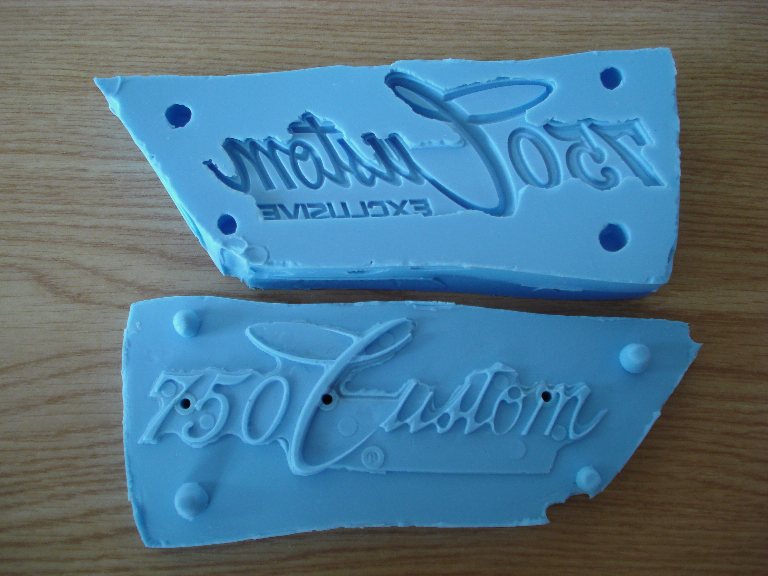
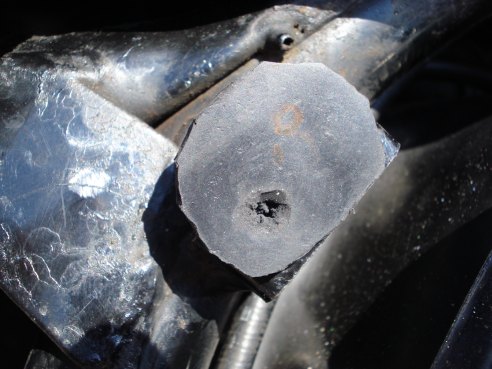
This left a badge to find. I knew there would be absolutely no chance of finding one so set about finding the best way to copy the one I had left. After a lot of phone calls and research on the internet I found out how to make an RTV (Room Temperature Vulcanising) Silicone Mould from which I could then make Resin casts.
Making The Mould
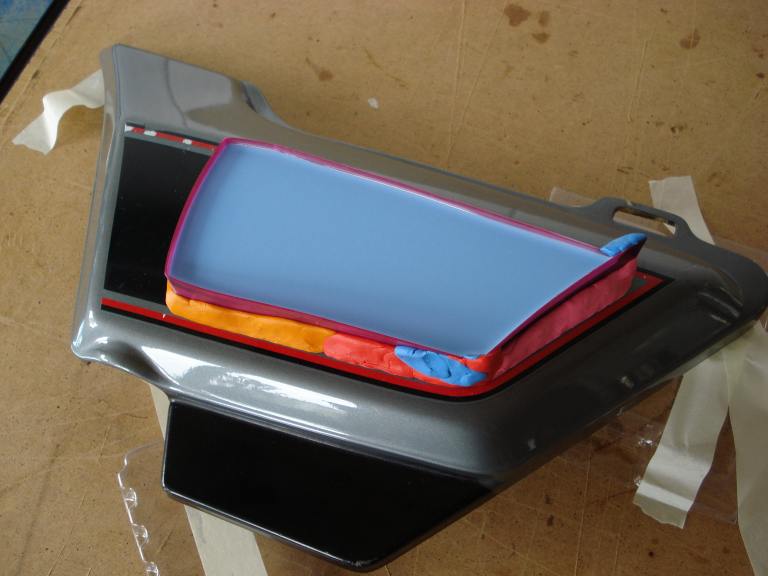
Thanks to Tomps for their invaluable advice over the telephone and the excellent help articles on their website. This is where I bought the mould and cast materials.Below is the left side panel, my only one, with the mould setting onto it. It had to be done this way to get the right curvature of the mould. I carefully removed the clips from the inside of the panel that held the badge in place. I then temporarily held the badge in place using bulldog clips. This was so I could easily remove the mould and badge in one piece when set. I cut strips of Asda kitchen mat and held them in place with Plasticene. I carefully avoided the red stripe on the panel as this damages fairly easily. I placed four lumps of plasticene onto the side panel near the corners to make locating pegs for the finished mould. I then filled the area with the RTV Silicone Rubber material which seemed to take forever to go off fully. The instructions said the material set very quickly. Initially, I thought I had made the mixture up incorrectly, but later I realised I had not, as when I made the bottom half of the mould, all the catalyst was used up. Maybe the catalyst was a bit old or the room temperature was too low or something.
The mould pulled off the side panel very easily once it had gone off fully (after about 12 hours). In fact I pulled the mould off the side panel and left the badge within the mould.
Below. I then reused the plastic strips and Plasticene on the top part of the mould. Heating up Vaseline over hot water and painting the resulting runny Vaseline onto the surface of the mould. I had left the original badge still embedded into the mould. I then filled it up with the rest of the RTV Silicone Rubber and left it for 12 hours again. As you can see from the photograph, I found the best thing to hold the sides in place were strategically positioned forks. The plastic strips and Silicone Rubber stuck to nothing so I used a circle of masking tape to hold things roughly in place and wedged it all together with the forks. I was quite pleased that no leaks developed in the making of either of the moulds.
The mould needed separating very carefully. I had painted Vaseline onto the surface to stop it sticking together but here and there, around the edges, it had still managed to glue itself together. I had to carefully split it with a sharp knife.
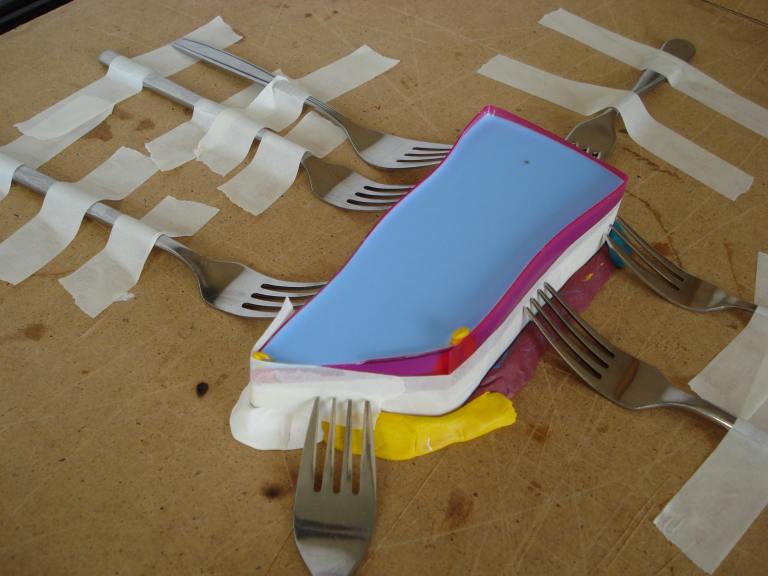
Use The Forks
The inside of the mould
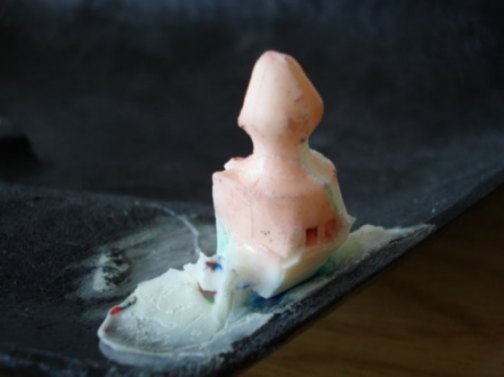
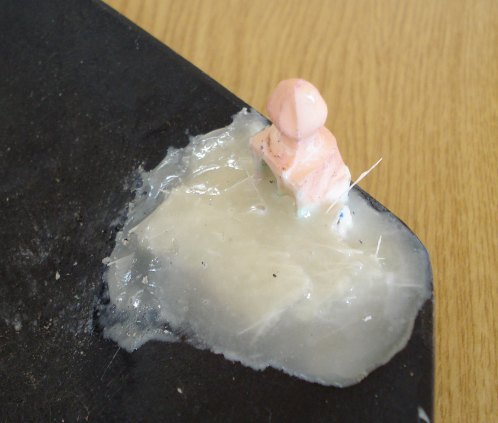
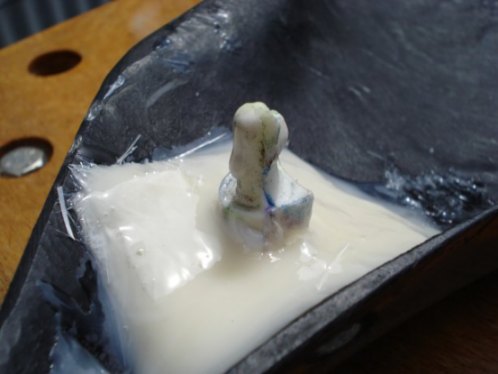
Making The Casts
Below is one of the casts that I made from the mould. I placed the top part of the mould onto a level surface. Poured in the mixture of resin and fine powdered Calcium Carbonate. As the badge is curved, I had to be careful not to put too much resin into the mould but enough to squeeze into the raised parts and up through the peg holes without making a mess of the whole thing. The resin did go off very quickly, there was only 3 or 4 minutes to work in from adding the two parts of resin together to the resin being too hard to do anything with.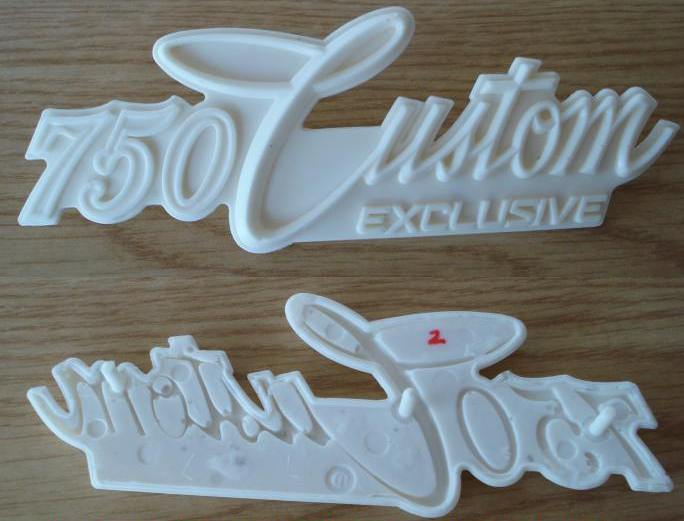
I have a cast spare and available if you are looking for a badge. Contact me using the contact form on the 8-Bit Software website that I run.
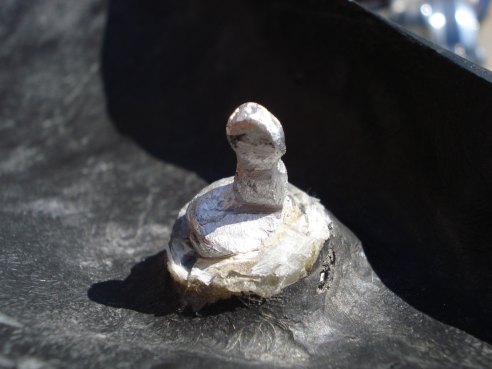
Then I had to trim off all the flash, sand down with very fine sandpaper and give the cast a very good scrub and wash with a slightly abrasive cream cleaner to make a key for the primer.
Initially, I had 11 attempts at casts to get a near perfect one although all were very good. Some had air bubbles in the backs which I filled with superglue (not the gel type), placing baking powder over the superglue immediately to stop it spreading into areas it was not needed. The baking powder washes off afterwards.
Before painting, the casts need shaping to a snug fit for the side panel. Heating the cast with a hair dryer and then placing it onto the side panel and holding it to the shape for a few moments until it cools does the trick admirably. The badge then fits better than the original!
Painting The Casts
Next I started the painting process having left the casts to cure for at least a week. After a few tests on left over bits of resin, I settled with the following paints:Hycote Plastic Primer. 2 coats sprayed 15 minutes apart. Then left for 3 days.
Hycote Black Enamel spray. 4 coats at 15 minute intervals. Left for 3 days to harden.
Red Humbrol Enamel painted on with a brush cut down to 4 hairs.
Plasti-Kote Gold Leaf Enamel. Painted on with a 000 brush.
I left 3 days between painting each colour to allow it all to harden sufficiently.
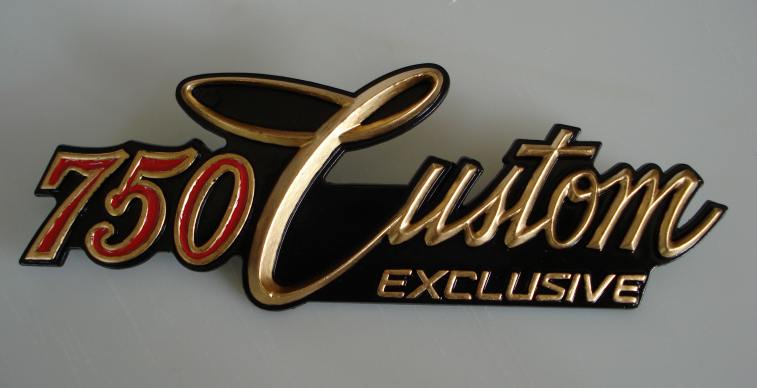
Below is a picture of my first cast finished.
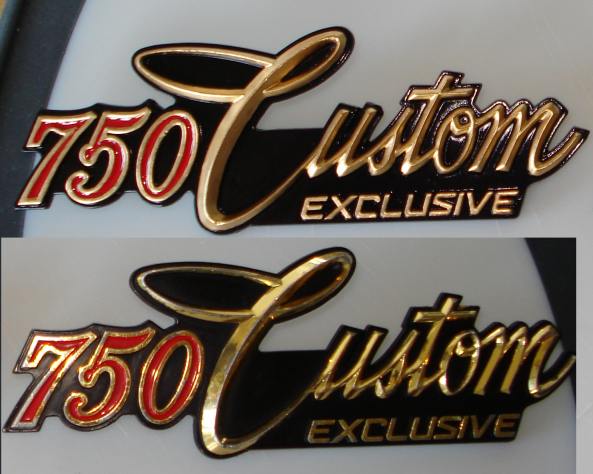
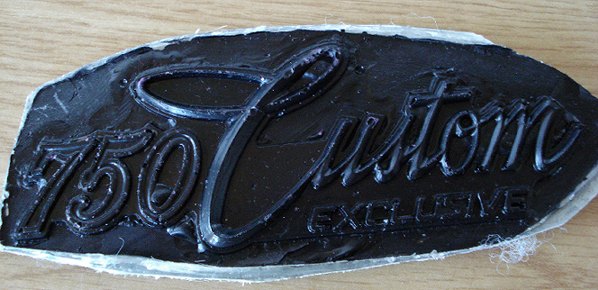
Below, a comparison of the copy and original. The original is at the bottom.
The Side Panel
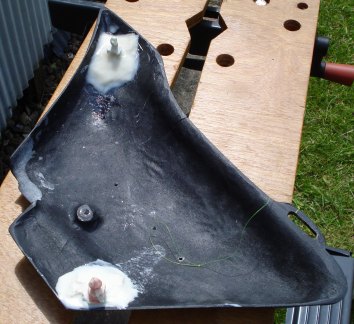
The side panel arrived after three weeks wait. There was nearly £20 customs duty to pay on it dammit. Graham at Replico had included a resin copy of the badge for me too.View of the top.
 View of the underside.
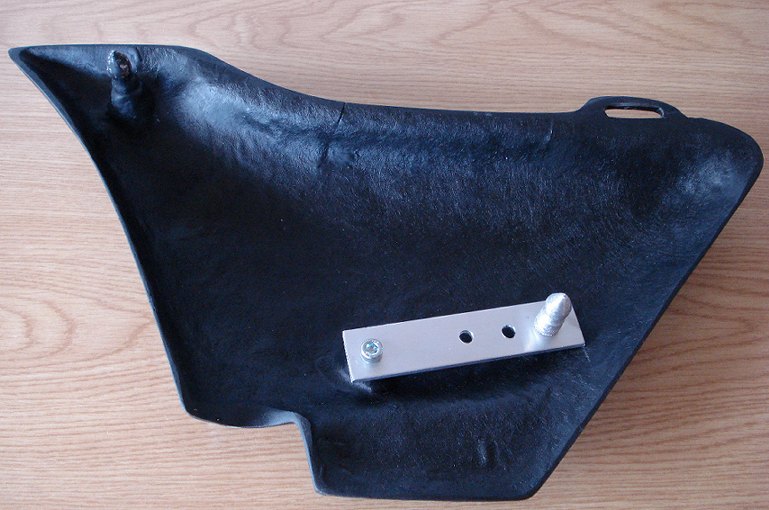 The Replico badge.
I could have done something with this but by the time I received it I had already made and painted another.
Unfortunately Replico was unable to put the pegs in the correct places. The top one was fixed to the panel, ever so slightly in the wrong place, too long and too fat with a 'blob' showing on the outside of the panel. The bottom peg was made as an adjustable one but unfortunately would not adjust into the right place although I could have made it work, I decided to go a different route. The bottom part of the panel that went around the frame did not really fit properly. I filed down the inside of the panel where it didn't fit over the frame. The panel was quite thick in the area of the slot at the top of the panel that hooks it on to the frame, good for strength but leaving no room between the seat and hook to actually fit and remove it without removing the seat. I decided against doing anything about that as it was probably a good idea that it was difficult to remove. I shortened the top peg and took away about 75% of the thickness. The panel then fitted more or less correctly.
The next task was to manufacture some pegs to fix to the panel. I had done this previously as there had been a peg missing from one of the panels when I got the bike. I made Plasticene moulds of the pegs on the left panel and filled them with resin. Pushing pieces of Plasticene onto the peg from two sides then slitting the mould to remove it. Carefully putting the two halves back together and then filling with resin. An unfortunate side effect of the resin is the heat it produces which tends to melt the Plasticine. Not enough to distort the mould but enough to make removal of all of the Plasticene afterwards difficult. I carefully picked off most of the Plasticene from the pegs and then scrubbed them clean with white spirit and a toothbrush.
Making the bottom peg.
 Making the top peg.
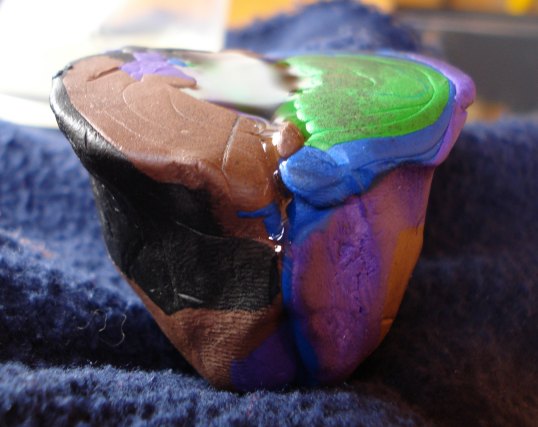
The next stage was quite tricky, getting the lower peg located correctly. I placed the lower peg into the grommet on the bike and offered the side panel up to it. I then trimmed the base of the peg so it would fit. I then re-fitted the peg into the grommet and mixed up some resin. Waiting until the resin had stiffened, I then placed some of the rapidly setting resin onto the peg and quickly placed the side panel over it and taped the panel into place until the resin set. The resin was running slightly, so I placed some Plasticene under the panel to stop it running off the panel altogether.
After about half an hour I then very carefully removed the panel from the bike. The peg at this stage was only lightly fixed to the panel. I washed the Plasticene off the panel with white spirit.
The lower peg in place.
I then put glass fiber and resin around the base of the peg to fix it in position permanently.
The lower peg finished.
This is the top peg which I cut down substantially.
I remade the grommet for the top peg from a lump of rubber as the existing one was not suitable due to the botched nature of the new one.
Here is the panel fitted with the 'blob' ground and sanded off. The area then primed. A lot of time was taken getting the badge into the correct position.
Finally, I decided to remove the top peg altogether and fasten in the peg that I made myself. In the second of these two images you can see both remade pegs and my experimental fishing line tie. You can also see where I have filed down the edge to fit the frame.
Concise Summary
This is a brief summary of the whole thing including costs etcR Side Panel
Ordered on 28/04/2009Finally paid on 6/5/2009
Posted (possibly) 08/05/2009
Arrived 28/05/2009
Replico 0061 412 093 165
Add 8 hours to current time for time in Australia
232 Main Road
McLaren Vale
SA 5171
Badge
Materials bought from www.tomps.com
1 x Calcium Carbonate Omya Carb 5 (Calcium Carbonate OMYA5) = £4.20
1 x Value RTV Silicone 0.5kg (RTV Silicone 05kg) = £9.99
Catalyst Speed Slow - Potlife 40 mins + £0.00
1 x Polyurethane Fast Cast Resin (PU Fast Cast) = £12.49
Method of mould production
1 Clip badge back to side panel using bulldog clips on pegs2 Create sides for mould on top of side panel using plasticene and cutting mat cut into strips. Avoid red lines
3 Make locating pegs in plasticene
4 Create top half of mould
5 Remove badge and top half of mould from side panel
6 Cover underside with Vaseline warmed over boiling water
7 Create box for bottom half of mould with plastic strips, plasticene and masking tape
8 Create bottom half of mould
9 Clean up mould
10 Elongate peg holes to outside of mould as an escape route for excess resin
Method of cast production
Mix Omya (1tsp) with 20g of part Fast Cast Resin A. Add 20g of Fast Cast Resin part B. Mix, work quickly.Pour into mould. Debubble. Place top part of mould
When setting, remove excess from drain holes with knife
CAST 11, NO OMYA USED. THIS TURNED OUT THE BEST
After 45 min to 1 hour, demould
Clean off flash
Fill bubbles and faults with Superglue and sprinkle with Baking Powder
Finishing Badge
Allow to cure as long as possibleSand - fine 320-400-1200
Wash with cream cleaner and toothbrush to make a key for primer
Shape to side panel using hair drier. When warm, badge goes floppy, cools fairly quickly and sets to shape of panel
Primer Grey
Leave 3 days
Spray black Leave 3 days
Paint Red
Paint Gold
?Laquer
Dust mould with talc and put into storage
Costs
Plasticine £1.10
Resin and RTV Silicone Rubber £39.44
Side Panel 1 £70 + £20 Customs duty
Side Panel 2 £88.14p
Telephone £3 £3 £1 £1 £2 £1 Total £11 Guesstimate
Breaker Search (fruitless) £8
Mixing cups and spoons £1.58
Paints £6.23 + £12.47
White Spirit £2.98
Superglue £3.48
Sandpaper £3.38
More paint (primer and black gloss) £7
Cream cleaner £1.50
Paint brushes £3.90
Silicone Tubing to mount badges £2.45
Badge eBay £12.50
This is as far as I have got.
Below here is temporary stuff which will alter as the job proceeds.23.Jul.2009 I have a couple of new leads on better side panels that I am following up. I watched with horror as one went on the US eBay for over £160. All without badges of course (fortunately, considering the effort that I have put in to making a copy). I need to spray the panel up. Probably professionally. I have now painted another 6 of the badges. I have now been using the bike with the badges mounted using silicone tubing pushed over the pegs on the inside of the panel. So far no problems, it seems to work very well. I have tied the side panels on with fishing line. I need to replace the grommets that hold the side panels on, these are readily available from David Silver Spares. I have just discovered, by examining the microfiche, that there should be a rubber cover over the hook at the rear of the panel (the third connection point), I may get a couple of these or do what I have done in the past and make my own from an old inner tube.
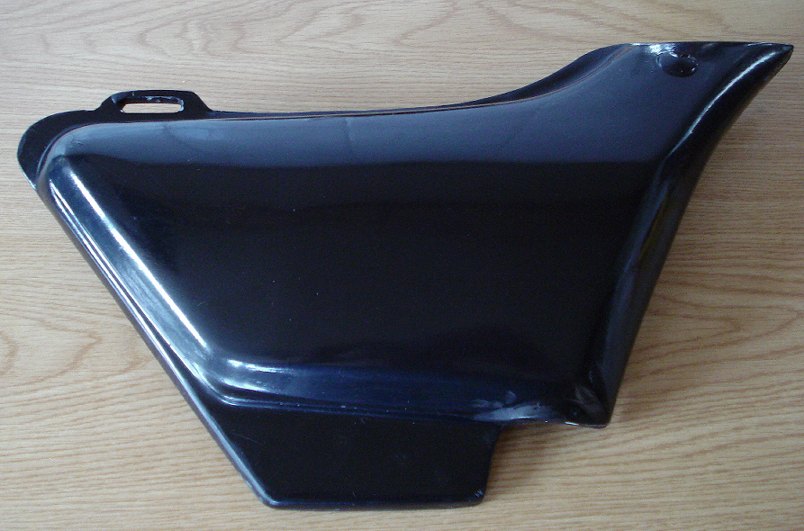
12/05/2010 Another new side panel arrived from an eBay seller in Germany 'stukami-moto-parts' is his User ID. This seller was very helpful and really quick. It cost me EUR100 £88.14 including postage. The panel is perfect. When painted up, it will look just like an original. Drilled the holes, fitted the badge. Here is the result. Just needs painting now:
08/06/2011 Colin Mansergh contacted me having read this page. He makes up side panels and badges for the CB 650 750 900 1000 Custom and Exclusive. Contact him at (disguised slightly) colin*dot*mansergh*at
hotmail*dot*com
02/07/2021 Above link may not work, testing it out.....